Introduction
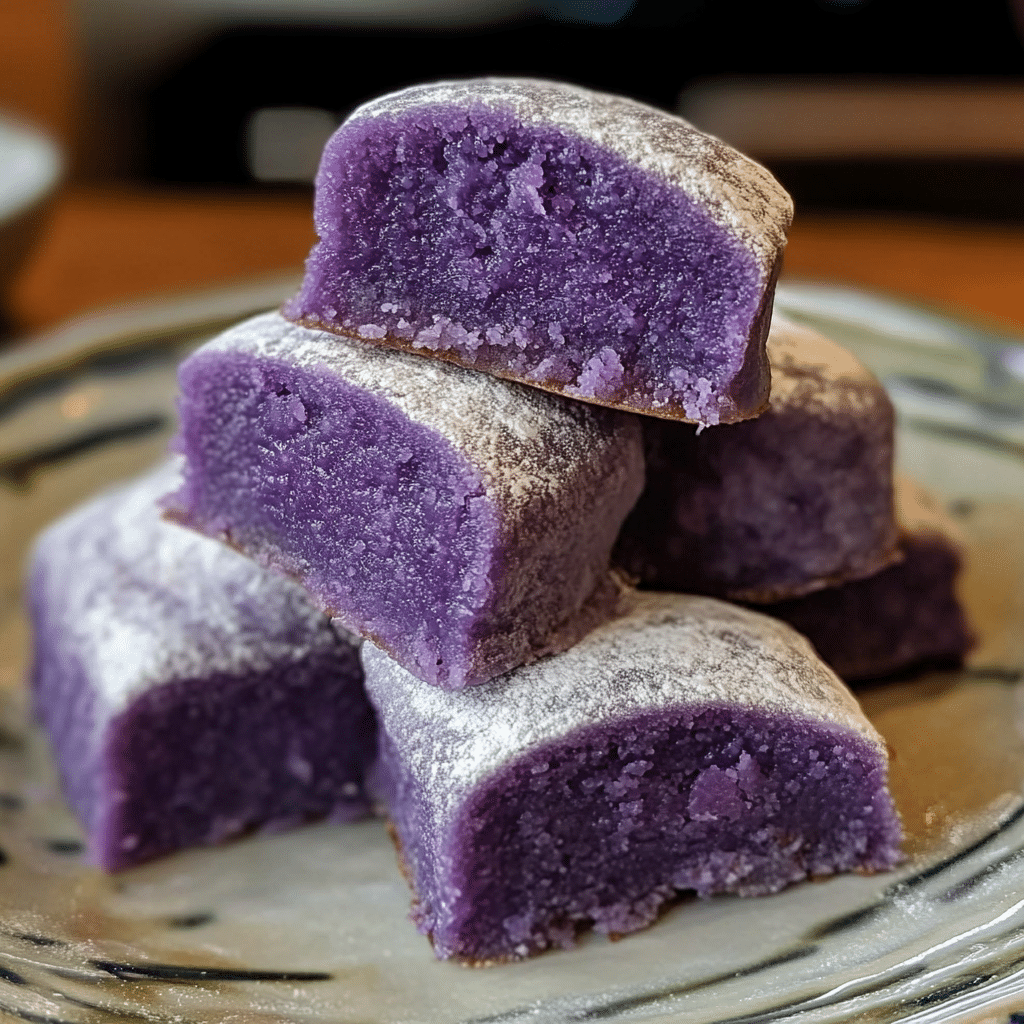
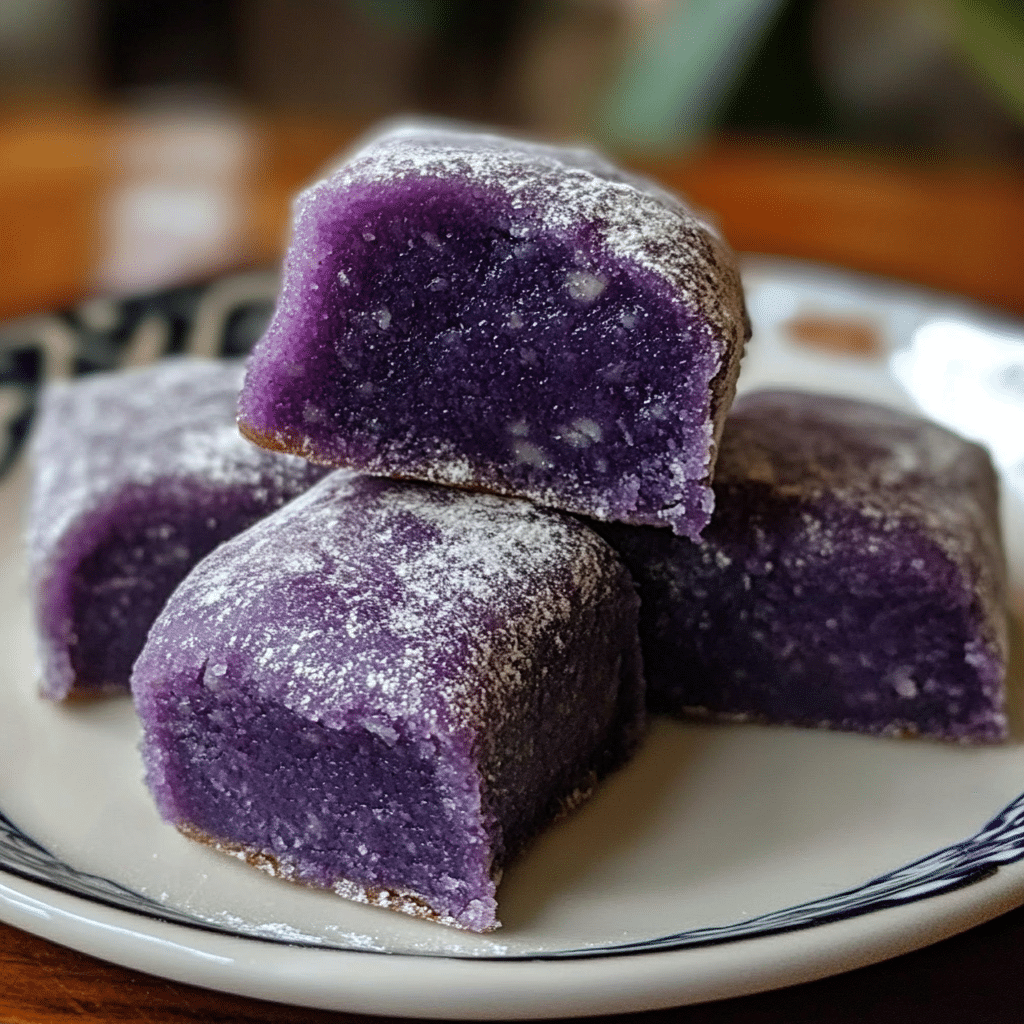
If you’ve never tried ube mochi before, you’re in for a real treat. Imagine the sweet, earthy flavor of ube (purple yam) paired with the irresistible chewiness of mochi—it’s a match made in dessert heaven! This recipe combines two of my favorite things: the vibrant, velvety richness of ube and the unique, stretchy texture of glutinous rice flour.
My love affair with ube began during childhood, when my grandmother would make batches of ube halaya (a rich, sweet yam jam) for family celebrations. Its vibrant purple hue always caught my eye, and its flavor was pure comfort—sweet, nutty, and earthy all at once. As for mochi, it’s been my go-to treat whenever I crave something chewy and satisfying. Marrying the two seemed like the ultimate idea for a dessert that would wow my family and friends.
This ube mochi is not only incredibly delicious but also surprisingly easy to make. With just a handful of ingredients and a little patience, you can whip up this colorful dessert for any occasion. Whether you’re serving it as a snack, dessert, or a sweet treat for celebrations, ube mochi will be the highlight of your table.
Why You’ll Love This Recipe
- Incredibly chewy texture: That satisfying stretchiness you love about mochi, combined with the smooth creaminess of ube.
- Burst of flavor: Sweet, nutty, and slightly earthy notes from the ube make every bite unforgettable.
- Simple ingredients: You only need a few pantry staples like glutinous rice flour, sugar, and coconut milk, along with ube halaya or ube powder.
- Visually stunning: The vibrant purple hue of ube mochi makes it an eye-catching dessert that’s perfect for gatherings or Instagram-worthy photos.
- Customizable: Add toppings like shredded coconut or sesame seeds for extra flair, or tweak the sweetness to your liking.
Preparation Time and Servings
- Prep Time: 15 minutes
- Cook Time: 1 hour
- Cooling Time: 1 hour
- Total Time: 2 hours 15 minutes
- Servings: 16 pieces
Ingredients
Ube Mochi:
- 2 cups glutinous rice flour
- 1 cup granulated sugar
- 1 ½ cups coconut milk
- 1 cup ube halaya (or 2 tbsp ube powder dissolved in ¼ cup warm water)
- ½ tsp ube extract (optional, for a more vibrant color)
- 1 tsp vanilla extract
For Toppings (Optional):
- ¼ cup shredded coconut, toasted
- 2 tbsp black sesame seeds
- Powdered sugar for dusting
Why These Ingredients Work:
- Glutinous rice flour: The star ingredient that gives mochi its iconic chewy texture.
- Ube halaya: Adds the rich ube flavor and creamy consistency.
- Coconut milk: Enhances the sweetness and adds a subtle tropical flavor.
- Ube extract: Boosts both color and flavor, ensuring every bite is vibrant and flavorful.
Step-by-Step Instructions
1. Preheat and Prepare:
- Preheat your oven to 350°F (175°C) and grease an 8×8-inch baking pan with butter or nonstick spray. Line it with parchment paper for easy removal.
2. Mix the Wet Ingredients:
- In a large mixing bowl, whisk together the coconut milk, ube halaya, ube extract, and vanilla extract until smooth. If you’re using ube powder, make sure it’s fully dissolved in warm water before mixing.
3. Combine the Dry Ingredients:
- In another bowl, sift together the glutinous rice flour and sugar. This step ensures the batter is smooth and free of lumps.
4. Make the Batter:
- Gradually add the dry ingredients into the wet mixture, whisking continuously to avoid lumps. The batter will be thick and smooth, with a beautiful purple hue.
5. Pour and Bake:
- Pour the batter into the prepared baking pan, spreading it out evenly with a spatula. Tap the pan gently on the counter to release any air bubbles.
- Bake in the preheated oven for 55-60 minutes, or until the top is set and a toothpick inserted into the center comes out clean.
6. Cool Completely:
- Once baked, allow the mochi to cool in the pan for 30 minutes. Then transfer it to a cooling rack and let it cool completely for at least 1 hour. This step is crucial for achieving the right texture.
7. Slice and Serve:
- Use a sharp knife to slice the mochi into 16 squares or rectangles. To prevent sticking, coat the knife with nonstick spray or dip it in warm water between cuts.
- Dust the tops with powdered sugar or your chosen toppings.
How to Serve
- As is: Serve ube mochi fresh out of the pan for a chewy, satisfying treat.
- With toppings: Sprinkle toasted coconut or sesame seeds on top for added texture and flavor.
- For celebrations: Arrange the squares on a dessert platter and garnish with edible flowers or gold leaf for a stunning presentation.
- With beverages: Pair with hot tea, iced coffee, or a refreshing glass of calamansi juice for a delightful snack combo.
Additional Tips
- Use fresh ube halaya: Homemade or high-quality store-bought halaya ensures the best flavor.
- Don’t skip the parchment paper: This prevents the mochi from sticking to the pan, making cleanup easier.
- Cool completely: Letting the mochi cool fully ensures the chewy texture firms up properly.
- Adjust sweetness: Feel free to reduce the sugar if you prefer a less sweet dessert.
- Storage: Keep leftover mochi in an airtight container at room temperature for up to 2 days or refrigerate for up to a week.
Recipe Variations
- Matcha Ube Mochi: Replace 1 tsp of the glutinous rice flour with matcha powder for a green tea twist.
- Coconut Ube Mochi: Stir in ½ cup shredded coconut into the batter for extra texture.
- Chocolate Ube Mochi: Add ½ cup chocolate chips to the batter for a gooey surprise in every bite.
- Mango Ube Mochi: Swirl in a layer of mango puree before baking for a tropical flavor combination.
Freezing and Storage
- Freezing: Wrap individual mochi pieces in plastic wrap and store them in a freezer-safe container. They’ll keep for up to 2 months. Thaw at room temperature or reheat in the microwave for 10-15 seconds.
- Refrigerating: Store in an airtight container in the fridge for up to a week. Let it come to room temperature before serving to regain the chewy texture.
Special Equipment
- Mixing bowls: For combining the wet and dry ingredients.
- 8×8-inch baking pan: The perfect size for evenly baked mochi squares.
- Parchment paper: Essential for easy removal from the pan.
- Sharp knife: For clean, precise cuts.
FAQ Section
1. Can I use a different type of flour if I can’t find glutinous rice flour?
No, glutinous rice flour is essential for achieving the chewy texture that defines mochi. Regular rice flour or all-purpose flour will not work as a substitute. Glutinous rice flour is widely available in Asian markets or online.
2. What can I use if I don’t have ube halaya or ube powder?
If you can’t find either, you can use mashed purple sweet potato as an alternative. While it won’t replicate the exact flavor of ube, it still provides a similar color and a mildly sweet, earthy taste. You may need to adjust the sugar and add a bit of ube extract for the authentic flavor.
3. Can I make ube mochi less sweet?
Absolutely! Reduce the sugar by about ¼ cup if you prefer a less sweet dessert. The mochi will still have the subtle sweetness of ube and coconut milk.
4. How do I keep mochi from sticking to my hands and knife?
Dust your hands and the knife with cornstarch or powdered sugar to prevent sticking. Alternatively, you can spray your knife with nonstick cooking spray or dip it in warm water before slicing.
5. Can I make this recipe in advance?
Yes! Ube mochi stores well. You can prepare it a day or two ahead of time and keep it in an airtight container at room temperature. It also freezes well for longer storage.
6. What if I don’t have an oven?
You can steam the batter instead. Pour it into a greased heatproof dish, cover with foil, and steam over medium heat for about 45 minutes. Let it cool before slicing.
Ube Mochi Recipe
- Total Time: 2 hours
Ingredients
For the Ube Mochi:
- 2 cups glutinous rice flour
- 1 cup granulated sugar
- 1 ½ cups coconut milk
- 1 cup ube halaya (or 2 tbsp ube powder dissolved in ¼ cup warm water)
- ½ tsp ube extract (optional, for a more vibrant color)
- 1 tsp vanilla extract
For Toppings (Optional):
- ¼ cup shredded coconut, toasted
- 2 tbsp black sesame seeds
- Powdered sugar for dusting
Instructions
1. Preheat and Prepare:
- Preheat your oven to 350°F (175°C) and grease an 8×8-inch baking pan with butter or nonstick spray. Line it with parchment paper for easy removal.
2. Mix the Wet Ingredients:
- In a large mixing bowl, whisk together the coconut milk, ube halaya, ube extract, and vanilla extract until smooth. If you’re using ube powder, make sure it’s fully dissolved in warm water before mixing.
3. Combine the Dry Ingredients:
- In another bowl, sift together the glutinous rice flour and sugar. This step ensures the batter is smooth and free of lumps.
4. Make the Batter:
- Gradually add the dry ingredients into the wet mixture, whisking continuously to avoid lumps. The batter will be thick and smooth, with a beautiful purple hue.
5. Pour and Bake:
- Pour the batter into the prepared baking pan, spreading it out evenly with a spatula. Tap the pan gently on the counter to release any air bubbles.
- Bake in the preheated oven for 55-60 minutes, or until the top is set and a toothpick inserted into the center comes out clean.
6. Cool Completely:
- Once baked, allow the mochi to cool in the pan for 30 minutes. Then transfer it to a cooling rack and let it cool completely for at least 1 hour. This step is crucial for achieving the right texture.
7. Slice and Serve:
- Use a sharp knife to slice the mochi into 16 squares or rectangles. To prevent sticking, coat the knife with nonstick spray or dip it in warm water between cuts.
- Dust the tops with powdered sugar or your chosen toppings.
- Prep Time: 15 minutes
- Cook Time: 1 hour
Nutrition
- Serving Size: 16
Conclusion
There’s nothing quite like the sweet, chewy satisfaction of homemade ube mochi. Its vibrant purple hue and delightful texture make it a standout dessert for any occasion. Whether you’re a long-time fan of ube or trying it for the first time, this recipe is guaranteed to impress.
Ube mochi is a true celebration of flavor, texture, and color—a dessert that’s as delightful to the eyes as it is to the taste buds. Whether you’re a fan of ube or just love the stretchy chewiness of mochi, this recipe is bound to become a favorite in your kitchen.
Its versatility makes it perfect for everything from casual snacks to special celebrations. Plus, the vibrant purple hue adds a festive touch to any dessert table. The process is simple, the ingredients are straightforward, and the results are nothing short of magical.
So, go ahead and give this recipe a try! Whether you’re making it for family, friends, or just yourself, you’re sure to create a dessert that sparks joy with every bite. Don’t forget to experiment with toppings or flavors and make it uniquely yours. If you make this ube mochi, share your creations with me—I’d love to see how it turns out for you. Happy baking!