Introduction
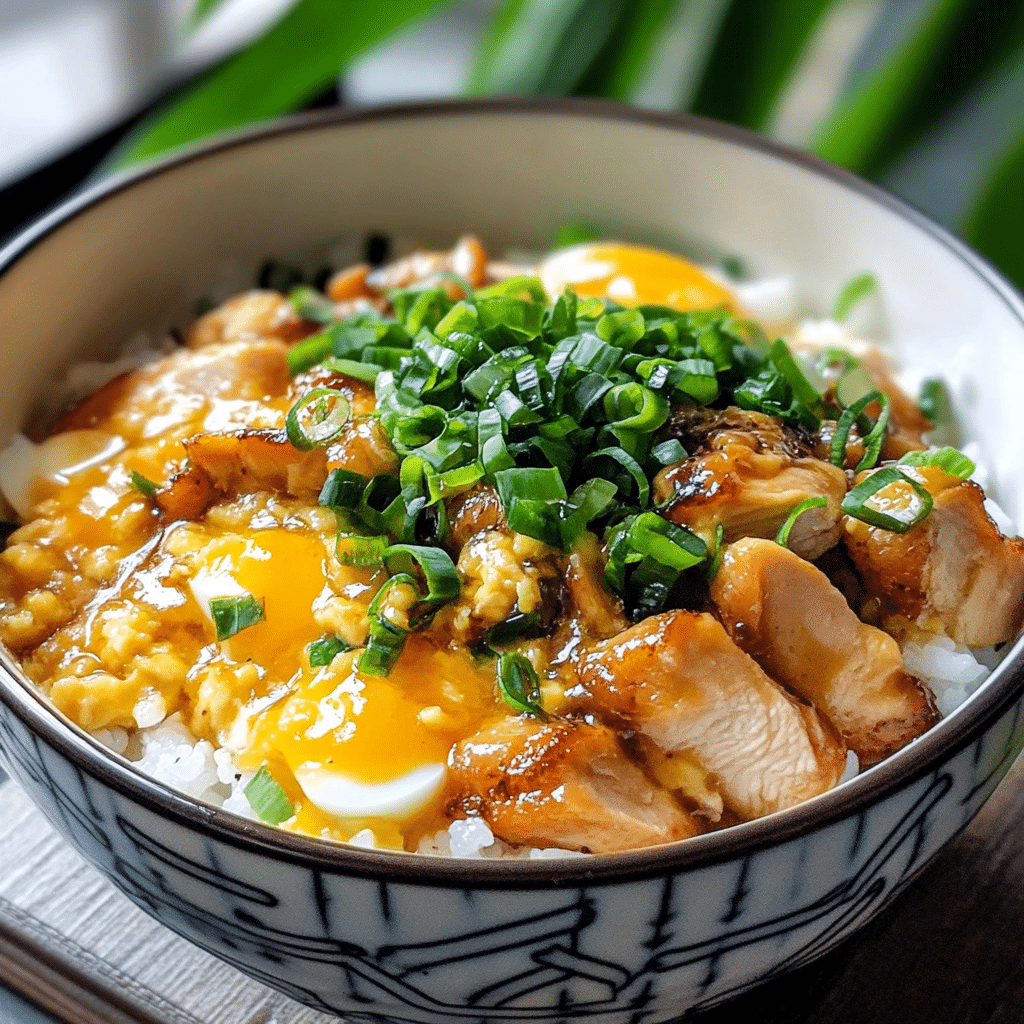
There’s something incredibly comforting about a warm rice bowl, topped with tender chicken and silky eggs. If you’ve ever had Japanese Chicken & Egg Rice Bowl, also known as Oyakodon, then you already know why this dish is a household favorite in Japan and all around the world. It’s a simple, yet flavorful dish that brings together the best of both worlds: savory chicken and eggs on a bed of fluffy rice. It’s the perfect meal for busy weeknights when you crave something satisfying and comforting, but you don’t have the time for complicated recipes.
This recipe is special because it combines everything you love about a good rice bowl—tender meat, silky eggs, and a delicious sauce that ties it all together. The flavors are balanced and comforting, with just the right amount of sweetness from the soy sauce and mirin, and a touch of savoriness from the chicken. It’s the kind of dish that makes you feel like you’re getting a warm hug from the inside.
I first discovered Oyakodon on a trip to Japan. After a long day of exploring, I wandered into a cozy little restaurant, and the moment I tasted the dish, I knew it was something special. The combination of perfectly cooked chicken and eggs over steaming rice was an instant hit, and I couldn’t wait to recreate it at home. Over the years, it’s become a go-to meal in my kitchen, especially when I need something quick but comforting.
If you’re new to cooking or just want a simple yet delicious meal to add to your repertoire, this Japanese Chicken & Egg Rice Bowl is the perfect recipe to try.
Why You’ll Love This Recipe
There are so many reasons to fall in love with this dish! Here’s why you need to try it:
- Easy to make: With just a few ingredients and a quick cooking process, this recipe is perfect for beginners and experienced cooks alike.
- Family-friendly: It’s a dish that appeals to everyone, from the pickiest eaters to the biggest foodies. Kids will love the tender chicken and creamy eggs, while adults will appreciate the depth of flavor.
- Quick and satisfying: Ready in under 30 minutes, this meal is perfect for those busy nights when you just want something filling and comforting without hours of prep.
- Rich, flavorful sauce: The soy sauce, mirin, and dashi come together to create a rich, savory sauce that coats the chicken and eggs beautifully, enhancing every bite.
- A versatile dish: You can easily customize it with different vegetables, proteins, or even tofu if you’re looking for a vegetarian option.
I especially love how customizable this recipe is. Whether you want to add vegetables like onions, mushrooms, or bell peppers, or switch up the protein to include beef or tofu, the base of the dish remains just as delicious. Plus, it’s one of those meals that feels like it’s made with love, even though it comes together in less than 30 minutes.
Preparation Time and Servings
- Total Time: 25 minutes
- Servings: 4
Nutrition Facts:
- Calories per serving: 450
- Protein: 30g
- Carbs: 50g
- Fat: 15g
Ingredients
This Japanese Chicken & Egg Rice Bowl relies on a few simple ingredients that come together to make something incredibly delicious. Here’s everything you’ll need:
- Chicken Thighs (boneless, skinless): 1 lb (about 450g) – I prefer using chicken thighs because they stay tender and juicy as they cook, but you can use chicken breast if you prefer leaner meat.
- Eggs: 4 large – The eggs create the beautiful, soft texture that makes this dish so comforting.
- Soy Sauce: 3 tbsp – This is the main seasoning for the dish, bringing that signature salty-sweet umami flavor.
- Mirin: 2 tbsp – A sweet rice wine that adds depth and sweetness to the sauce. You can substitute with honey or maple syrup if you prefer.
- Dashi Stock (or Chicken Broth): 1 cup – Dashi is a Japanese broth made from bonito flakes and seaweed. You can use store-bought dashi stock or chicken broth as a substitute.
- Sugar: 1 tbsp – Just a touch to balance the salty-sweet sauce.
- Rice: 2 cups (cooked) – The base of the dish! I recommend using short-grain Japanese rice for its sticky, chewy texture.
- Green Onions (optional): 2 stalks, chopped – For garnish and a fresh flavor contrast.
- Sesame Seeds (optional): For garnish.
Why These Ingredients Matter:
- Chicken Thighs: The richness and tenderness of chicken thighs make them ideal for this dish, as they hold up well in the simmering sauce and stay juicy.
- Mirin & Soy Sauce: These ingredients create the essential sweet-savory balance that is the hallmark of Japanese cuisine. It gives the dish its unique flavor that you won’t find in many other rice bowls.
- Dashi: This simple broth adds depth to the dish and enhances the overall umami experience. If you’re new to dashi, don’t be intimidated—it’s easy to find pre-made versions at most grocery stores or online.
Step-by-Step Instructions
1st Step: Prepare the Rice
- Start by cooking your rice. If you have a rice cooker, simply follow the instructions for cooking 2 cups of short-grain rice. If you’re using a stovetop method, rinse the rice until the water runs clear, then cook it in a pot with 2 ½ cups of water. Once it’s cooked, let it rest covered for about 10 minutes to ensure it’s nice and fluffy.
- When serving, divide the rice evenly into four bowls. The rice serves as the base of the dish, so make sure each bowl is generously filled with rice.
2nd Step: Prepare the Chicken
- While your rice is cooking, cut your chicken thighs into bite-sized pieces. If you’re using chicken breast, be sure to slice it thinly so it cooks quickly and evenly.
- Heat a skillet or large frying pan over medium heat and add a splash of oil. When the pan is hot, add the chicken pieces and cook for about 5-7 minutes, or until the chicken is browned on all sides. Don’t worry if the chicken isn’t fully cooked through at this point—it’ll finish cooking in the sauce.
3rd Step: Make the Sauce
- In a small bowl, combine the soy sauce, mirin, sugar, and dashi stock (or chicken broth). Stir until the sugar dissolves.
- Once the chicken is browned, pour the sauce mixture over the chicken in the pan. Let it simmer for about 3-4 minutes to allow the flavors to meld together. The sauce will reduce slightly, intensifying in flavor.
- Taste the sauce and adjust the seasoning as needed. If you like it sweeter, add a little more sugar or mirin; if you prefer a saltier dish, add a touch more soy sauce.
4th Step: Add the Eggs
- Crack the eggs into a bowl and whisk them lightly. You want them to be mixed but not frothy. You don’t want scrambled eggs in this dish—you want them to cook gently into the sauce.
- Pour the beaten eggs over the chicken in the pan. Gently swirl the pan to ensure the eggs are evenly distributed. Cover the pan and let the eggs cook for 2-3 minutes, or until they’re just set but still creamy.
5th Step: Assemble the Bowl
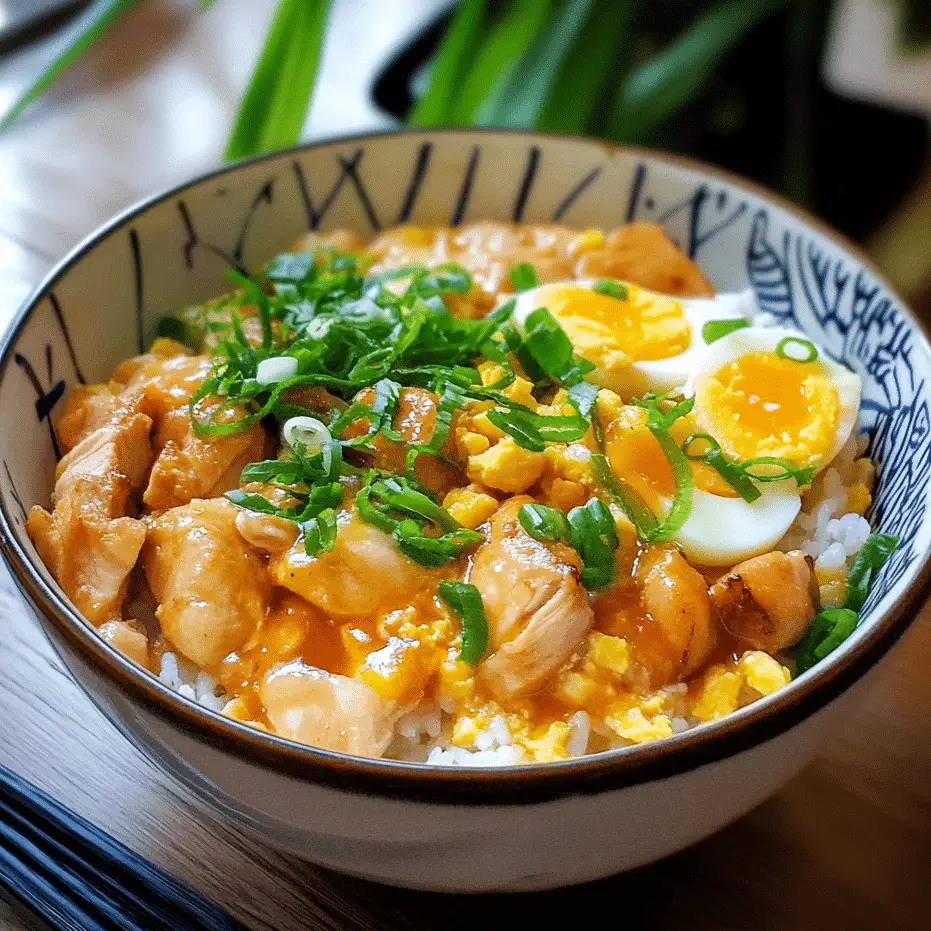
- Once the eggs are cooked, gently spoon the chicken and eggs over the rice in each bowl. Be careful not to break up the eggs too much— you want them to stay soft and velvety.
- Garnish with sliced green onions and a sprinkle of sesame seeds for an extra burst of flavor.
How to Serve
- Over Rice: This dish is traditionally served over a bowl of hot steamed rice, and that’s how I recommend serving it. The rice absorbs the sauce, making each bite rich and flavorful.
- With Side Dishes: Pair it with a simple side of steamed vegetables or a light miso soup to round out the meal.
- With Pickles: You can also serve it with Japanese pickles (like takuan or pickled ginger) for a tangy contrast to the richness of the chicken and eggs.
Additional Tips
- Drain the Eggs: When adding the eggs to the sauce, don’t overcook them. You want them to be soft and creamy, not rubbery.
- Use Fresh Dashi: If you can, make your own dashi stock at home—it’s surprisingly easy and gives the dish an extra layer of flavor. But store-bought dashi works just fine.
- Control the Sweetness: Adjust the sweetness of the sauce by playing around with the amount of mirin or sugar you add.
- Make it Ahead: If you’re short on time, you can prepare the chicken and sauce ahead of time, then just add the eggs and heat everything up when you’re ready to serve.
- Keep It Tender: Be gentle when stirring the chicken and eggs so they remain tender and don’t get overcooked.
Recipe Variations
- Vegetarian Option: Swap out the chicken for tofu or a mix of mushrooms for a vegetarian twist. Press the tofu to remove excess moisture and cut it into cubes before cooking it in the sauce.
- Gluten-Free: Use tamari instead of soy sauce to make this dish gluten-free. You can also try using coconut aminos as a soy sauce alternative.
- Add Vegetables: For extra nutrition and flavor, feel free to add vegetables like spinach, mushrooms, or bell peppers to the dish.
- Spicy Kick: Add a pinch of chili flakes or a dash of sriracha to the sauce for a little heat.
Freezing and Storage
- Storage: Leftovers can be stored in an airtight container in the refrigerator for up to 2 days. Reheat gently in the microwave or on the stove with a splash of water to prevent the rice from drying out.
- Freezing: You can freeze the cooked chicken and sauce separately from the rice. To reheat, thaw the chicken mixture in the fridge overnight and warm it up in a pan before serving over fresh rice.
FAQ Section
Can I use chicken breast instead of thighs?
Yes! Chicken breast will work just fine, but it may not be as juicy and tender as chicken thighs.
Can I make this dish vegetarian?
Absolutely! Try tofu or a variety of mushrooms instead of the chicken for a delicious vegetarian version.
Can I make this ahead of time?
Yes! You can prepare the chicken and sauce ahead of time and store it in the fridge for up to a day. Just add the eggs right before serving.
How can I make the eggs extra creamy?
To get creamy eggs, don’t overcook them! Once they’re just set, remove them from the heat and they’ll finish cooking in the residual heat.

Japanese Chicken & Egg Rice Bowl
- Total Time: 25 minutes
Ingredients
- Chicken Thighs (boneless, skinless): 1 lb (about 450g) – I prefer using chicken thighs because they stay tender and juicy as they cook, but you can use chicken breast if you prefer leaner meat.
- Eggs: 4 large – The eggs create the beautiful, soft texture that makes this dish so comforting.
- Soy Sauce: 3 tbsp – This is the main seasoning for the dish, bringing that signature salty-sweet umami flavor.
- Mirin: 2 tbsp – A sweet rice wine that adds depth and sweetness to the sauce. You can substitute with honey or maple syrup if you prefer.
- Dashi Stock (or Chicken Broth): 1 cup – Dashi is a Japanese broth made from bonito flakes and seaweed. You can use store-bought dashi stock or chicken broth as a substitute.
- Sugar: 1 tbsp – Just a touch to balance the salty-sweet sauce.
- Rice: 2 cups (cooked) – The base of the dish! I recommend using short-grain Japanese rice for its sticky, chewy texture.
- Green Onions (optional): 2 stalks, chopped – For garnish and a fresh flavor contrast.
- Sesame Seeds (optional): For garnish.
Instructions
Step 1: Prepare the Rice
- Start by cooking your rice. If you have a rice cooker, simply follow the instructions for cooking 2 cups of short-grain rice. If you’re using a stovetop method, rinse the rice until the water runs clear, then cook it in a pot with 2 ½ cups of water. Once it’s cooked, let it rest covered for about 10 minutes to ensure it’s nice and fluffy.
- When serving, divide the rice evenly into four bowls. The rice serves as the base of the dish, so make sure each bowl is generously filled with rice.
Step 2: Prepare the Chicken
- While your rice is cooking, cut your chicken thighs into bite-sized pieces. If you’re using chicken breast, be sure to slice it thinly so it cooks quickly and evenly.
- Heat a skillet or large frying pan over medium heat and add a splash of oil. When the pan is hot, add the chicken pieces and cook for about 5-7 minutes, or until the chicken is browned on all sides. Don’t worry if the chicken isn’t fully cooked through at this point—it’ll finish cooking in the sauce.
Step 3: Make the Sauce
- In a small bowl, combine the soy sauce, mirin, sugar, and dashi stock (or chicken broth). Stir until the sugar dissolves.
- Once the chicken is browned, pour the sauce mixture over the chicken in the pan. Let it simmer for about 3-4 minutes to allow the flavors to meld together. The sauce will reduce slightly, intensifying in flavor.
- Taste the sauce and adjust the seasoning as needed. If you like it sweeter, add a little more sugar or mirin; if you prefer a saltier dish, add a touch more soy sauce.
Step 4: Add the Eggs
- Crack the eggs into a bowl and whisk them lightly. You want them to be mixed but not frothy. You don’t want scrambled eggs in this dish—you want them to cook gently into the sauce.
- Pour the beaten eggs over the chicken in the pan. Gently swirl the pan to ensure the eggs are evenly distributed. Cover the pan and let the eggs cook for 2-3 minutes, or until they’re just set but still creamy.
Step 5: Assemble the Bowl
- Once the eggs are cooked, gently spoon the chicken and eggs over the rice in each bowl. Be careful not to break up the eggs too much— you want them to stay soft and velvety.
- Garnish with sliced green onions and a sprinkle of sesame seeds for an extra burst of flavor.
Nutrition
- Serving Size: 4
- Calories: 450
- Fat: 15g
- Carbohydrates: 50g
- Protein: 30g
Conclusion
I hope you’re as excited to make this Japanese Chicken & Egg Rice Bowl as I am! It’s a simple, comforting dish that’s sure to become a staple in your meal rotation. If you give it a try, I’d love to hear how it turns out for you! Don’t forget to snap a photo and tag me on Instagram—I love seeing your delicious creations!