Introduction
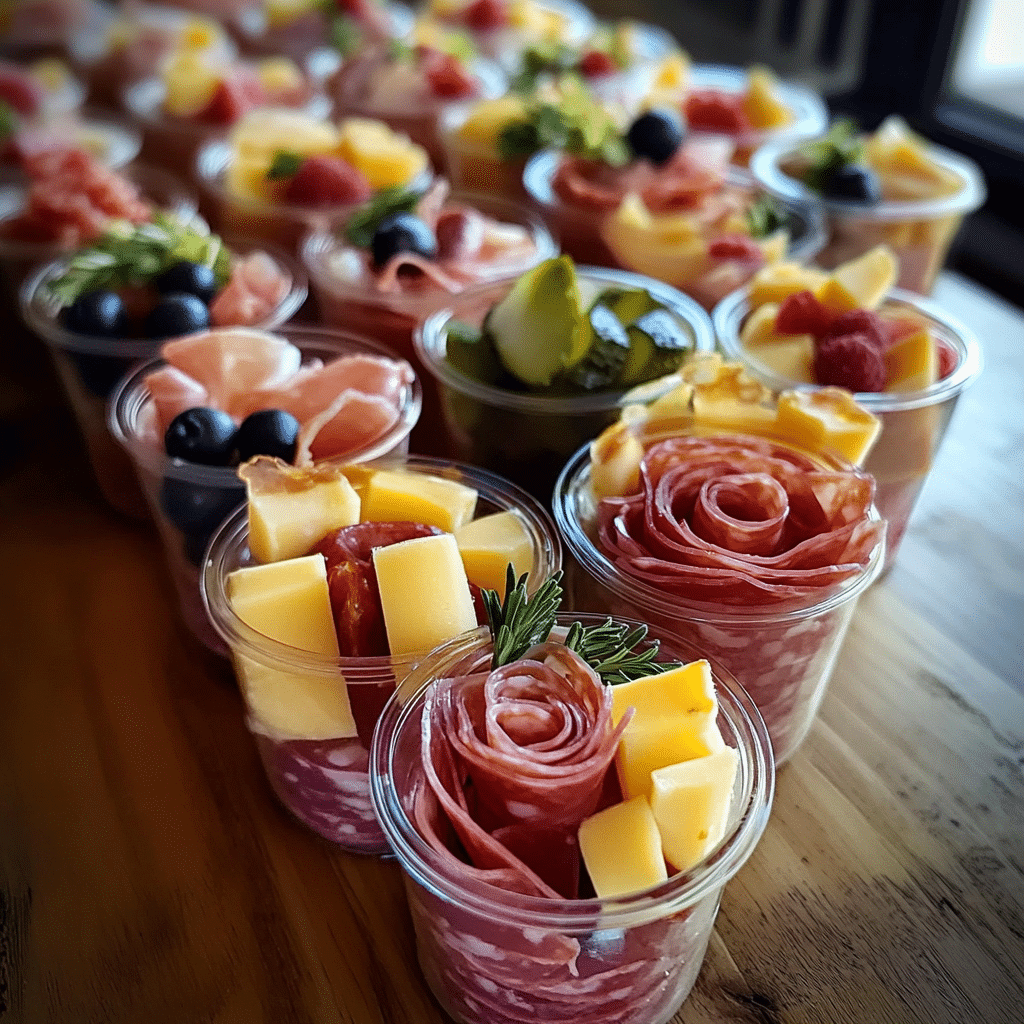
When it comes to snacking, there’s nothing more satisfying than a good charcuterie board. It’s the kind of spread that has everything you could ever want—savory meats, creamy cheeses, fresh fruit, and crunchy crackers, all in one beautiful display. But what if I told you there’s a way to enjoy all the deliciousness of a charcuterie board without the mess or stress of sharing? Enter: Individual Charcuterie Cups. These personal-sized servings are a fun, portable twist on the classic charcuterie platter. They’re perfect for parties, picnics, or even just a solo snack when you’re craving something special.
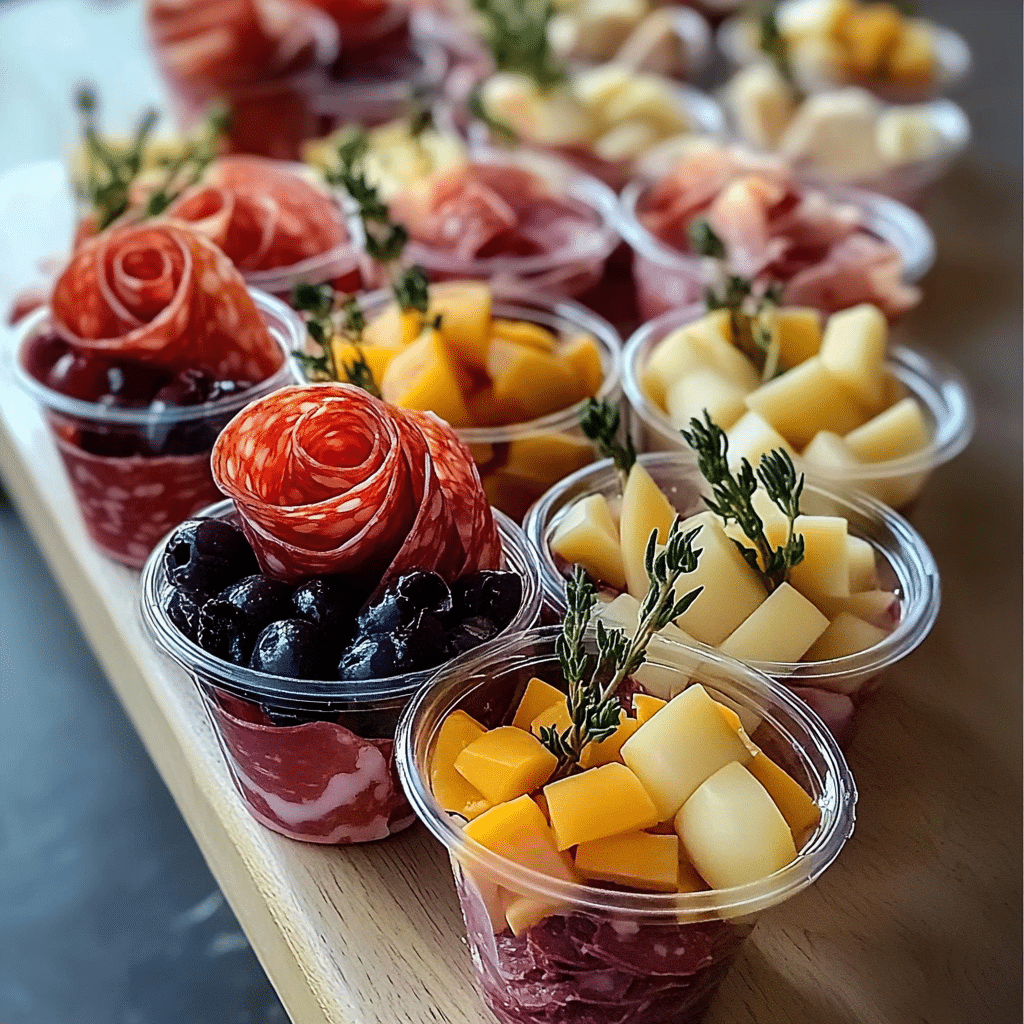
I first came across the idea for individual charcuterie cups at a holiday gathering, and let me tell you—it was love at first bite. Instead of the usual giant boards or platters, each guest had their own little cup filled with their own assortment of goodies. Not only was it a fun, creative way to serve appetizers, but it also kept everyone’s hands out of the communal platter, which is always a plus! The combination of textures and flavors in each bite—salty meats, creamy cheeses, crispy crackers, and a pop of sweetness from fresh fruit—was just chef’s kiss.
What makes these charcuterie cups so great is that they’re incredibly customizable. Whether you prefer classic cured meats, or you’re all about the cheese, you can tweak the ingredients to fit your taste. Plus, these little cups are a breeze to assemble and make for an elegant, yet approachable, addition to any spread. Keep reading to see just how easy and fun they are to put together!
Why You’ll Love These Individual Charcuterie Cups
These individual charcuterie cups are perfect for so many reasons:
- Customizable to your taste: The best part about this recipe is that you can tailor it to fit your specific preferences or dietary needs. You can choose from a variety of cheeses, meats, fruits, and even condiments. Whether you’re a fan of sharp cheddar or creamy brie, or prefer turkey over prosciutto, you have full control over what goes in your cup.
- Perfect for parties: These cups are an excellent way to serve charcuterie at a large gathering. They make it so easy for guests to grab a serving without the hassle of serving utensils or worrying about who touched what.
- Quick and easy to assemble: You won’t need to spend hours prepping for these. With minimal ingredients and a few simple steps, you’ll have everything ready in no time. It’s a great option when you need a snack or appetizer in a hurry.
- Great for portion control: Instead of overloading your plate or ending up with too much leftover, these individual servings help control portions, making it easier to enjoy a little bit of everything without going overboard.
- Visually appealing: Let’s be real—these cups look absolutely adorable. When you set them out at a party or gathering, they’ll instantly add an elegant touch to your spread.
Preparation Time and Servings
Total Time: 15-20 minutes (depending on how many cups you’re preparing)
Servings: This recipe yields 6-8 individual cups, perfect for small gatherings or personal snacks. You can easily adjust the servings based on the number of guests.
Nutrition Facts:
- Calories per serving: 200-250 (depending on your ingredients)
- Protein: 12g
- Carbs: 5g
- Fat: 18g
Ingredients
To make these individual charcuterie cups, you’ll need a few key ingredients. Feel free to get creative and swap items based on what you love or have available!
- Cured Meats (4 oz): I recommend a mix of your favorites, like prosciutto, salami, or turkey slices. If you prefer halal options, turkey or beef salami works wonderfully.
- Cheeses (4 oz): A variety of cheeses adds depth to each bite. Consider including a hard cheese like cheddar, a creamy option like brie, and something with a bit of tang, such as goat cheese or blue cheese.
- Crackers (1 box): Choose a sturdy, slightly salty cracker that can hold up to the meats and cheeses. Water crackers or whole grain crackers are great choices.
- Fresh Fruit (1 cup): Grapes, sliced strawberries, or apple wedges are perfect for adding sweetness and balance to the savory ingredients.
- Nuts (1/4 cup): Almonds, walnuts, or pistachios bring a nice crunch and contrast to the other soft ingredients.
- Pickles or Olives (optional, 1/4 cup): Add a tangy bite to balance the richness of the meats and cheeses.
- Condiments (optional): A small dollop of honey, Dijon mustard, or fig jam can take the flavor profile to the next level.
Step-by-Step Instructions
- Prepare the Ingredients:
Start by laying out all your ingredients. Slice your cheeses into bite-sized pieces, cut your meats into manageable strips or rounds, and wash your fruit. If you’re using pickles or olives, drain them, and if you’re using nuts, give them a quick chop if you prefer smaller pieces. This will make assembly quick and easy. - Prepare the Cups:
For the cups, you can use small clear plastic cups, mason jars, or even mini bowls. I love using clear cups because they show off the colorful layers inside, making the presentation even more stunning. Arrange the cups on a large tray or surface to make assembly easier. - Layer the Ingredients:
Start by adding your base layer—this could be crackers, cheese, or meat. I recommend placing a few crackers at the bottom of each cup, followed by a slice or two of your favorite cheese. The crackers act as the base, while the cheese adds a creamy element to each bite. - Add the Meats:
Now, fold your slices of meat (prosciutto, salami, etc.) and nestle them into the cup, creating a bit of height and texture. You want a nice variety in each cup, so try to place a few different kinds of meat in each. - Layer the Fruit:
Next, add in some fresh fruit. Grapes, strawberries, or apple slices not only add a burst of color, but they also provide a refreshing balance to the salty meats and cheeses. Place them in between the crackers, cheese, and meat layers to fill out the cup. - Add the Nuts and Pickles:
Scatter a small handful of nuts into each cup. They’ll give your charcuterie cup a nice crunch. If you’re adding pickles or olives, place them toward the side of the cup so they’re easy to grab. - Drizzle with Condiments:
For a bit of added flavor, drizzle a little honey, fig jam, or Dijon mustard into the cup. I love honey with brie, but you can also add mustard if you’re using more savory meats. - Garnish and Serve:
Finally, garnish your cups with fresh herbs like rosemary or thyme to give them an aromatic touch. Once the cups are filled, they’re ready to serve!
How to Serve
These individual charcuterie cups are perfect for serving as a snack or appetizer at any gathering. Here are a few ideas for serving them:
- Serve as a stand-alone appetizer: Place the cups on a tray and let guests grab their own. No need for serving utensils—just grab and go!
- Pair with a beverage: Serve alongside sparkling water, wine, or a light cocktail for a more elegant touch.
- Add some extra snacks: If you’re hosting a party, you can pair the charcuterie cups with some fun sides like deviled eggs, mini quiches, or a bowl of olives.
Additional Tips
- Customize the Ingredients:
Don’t be afraid to experiment with different types of meats, cheeses, or fruits. For a more Mediterranean twist, try including some feta cheese, prosciutto, and olives. Or go for a sweet and savory combo with brie, honey, and apple slices. - Add Some Crunch:
Besides crackers, you can add pretzels, pita chips, or even roasted chickpeas for an extra crunch. The texture contrast makes each bite more satisfying. - Make Ahead:
These charcuterie cups are great for prepping in advance. Assemble the cups up to a day ahead, then cover and refrigerate until ready to serve. Just make sure not to add any condiments or fresh fruit until right before serving to prevent sogginess. - Use Small Containers:
If you’re serving these for a more casual event, small mason jars or plastic cups work great. They’re sturdy, easy to handle, and help keep everything neatly contained. - Check for Dietary Restrictions:
Make sure to ask your guests if they have any dietary preferences. You can easily make these cups vegetarian, gluten-free, or dairy-free by switching out the ingredients to suit everyone’s needs.
Recipe Variations
- Vegetarian Option:
Swap out the meats for extra cheeses, roasted vegetables, or plant-based deli slices. You could include hummus, marinated artichokes, and sun-dried tomatoes to create a Mediterranean-inspired vegetarian charcuterie cup. - Gluten-Free:
If you’re looking for a gluten-free option, use gluten-free crackers or even sliced cucumber as a base. Rice cakes are another great substitute for crackers and provide a nice crunch. - Sweet and Savory:
For a fun twist, use sweet cheeses like mascarpone or goat cheese with fruit preserves and honey. Pair these with salty prosciutto and fresh figs for a balance of flavors that’s sure to impress.
Frequently Asked Questions (FAQ)
1. Can I prepare these individual charcuterie cups ahead of time?
Yes! These charcuterie cups are perfect for prepping in advance. You can assemble the cups a day or two before your event. However, I recommend not adding fresh fruits or condiments (like honey or mustard) until right before serving to keep everything fresh. Simply cover the cups with plastic wrap and refrigerate until you’re ready to serve.
2. Can I use different types of meats?
Absolutely! The beauty of charcuterie cups is that they’re highly customizable. You can use any combination of meats you like. Popular options include salami, prosciutto, turkey, ham, chorizo, or even vegetarian-friendly deli slices. Feel free to mix and match based on your preferences.
3. Can I make a vegetarian version of the charcuterie cups?
Yes! For a vegetarian version, simply swap out the meats for extra cheeses, roasted vegetables, nuts, or even plant-based deli slices. You can also include ingredients like hummus, marinated artichokes, olives, or pickled vegetables for extra flavor and texture.
4. What type of containers are best for these cups?
You can use a variety of containers depending on the occasion. Clear plastic cups, small mason jars, or even mini bowls work great for these individual servings. Clear containers are particularly nice because they showcase the vibrant layers of your charcuterie cups.
5. How do I ensure the crackers stay crunchy?
To ensure the crackers stay crunchy, place them at the bottom of the cup and add the wetter ingredients (like cheese or fruit) on top. If you’re prepping ahead of time, consider placing the crackers in a small plastic bag or wrapping them separately until right before serving.
Print
Individual Charcuterie Cups
- Total Time: 20 minutes
Ingredients
- Cured Meats (4 oz): I recommend a mix of your favorites, like prosciutto, salami, or turkey slices. If you prefer halal options, turkey or beef salami works wonderfully.
- Cheeses (4 oz): A variety of cheeses adds depth to each bite. Consider including a hard cheese like cheddar, a creamy option like brie, and something with a bit of tang, such as goat cheese or blue cheese.
- Crackers (1 box): Choose a sturdy, slightly salty cracker that can hold up to the meats and cheeses. Water crackers or whole grain crackers are great choices.
- Fresh Fruit (1 cup): Grapes, sliced strawberries, or apple wedges are perfect for adding sweetness and balance to the savory ingredients.
- Nuts (1/4 cup): Almonds, walnuts, or pistachios bring a nice crunch and contrast to the other soft ingredients.
- Pickles or Olives (optional, 1/4 cup): Add a tangy bite to balance the richness of the meats and cheeses.
- Condiments (optional): A small dollop of honey, Dijon mustard, or fig jam can take the flavor profile to the next level.
Instructions
- Prepare the Ingredients:
Start by laying out all your ingredients. Slice your cheeses into bite-sized pieces, cut your meats into manageable strips or rounds, and wash your fruit. If you’re using pickles or olives, drain them, and if you’re using nuts, give them a quick chop if you prefer smaller pieces. This will make assembly quick and easy. - Prepare the Cups:
For the cups, you can use small clear plastic cups, mason jars, or even mini bowls. I love using clear cups because they show off the colorful layers inside, making the presentation even more stunning. Arrange the cups on a large tray or surface to make assembly easier. - Layer the Ingredients:
Start by adding your base layer—this could be crackers, cheese, or meat. I recommend placing a few crackers at the bottom of each cup, followed by a slice or two of your favorite cheese. The crackers act as the base, while the cheese adds a creamy element to each bite. - Add the Meats:
Now, fold your slices of meat (prosciutto, salami, etc.) and nestle them into the cup, creating a bit of height and texture. You want a nice variety in each cup, so try to place a few different kinds of meat in each. - Layer the Fruit:
Next, add in some fresh fruit. Grapes, strawberries, or apple slices not only add a burst of color, but they also provide a refreshing balance to the salty meats and cheeses. Place them in between the crackers, cheese, and meat layers to fill out the cup. - Add the Nuts and Pickles:
Scatter a small handful of nuts into each cup. They’ll give your charcuterie cup a nice crunch. If you’re adding pickles or olives, place them toward the side of the cup so they’re easy to grab. - Drizzle with Condiments:
For a bit of added flavor, drizzle a little honey, fig jam, or Dijon mustard into the cup. I love honey with brie, but you can also add mustard if you’re using more savory meats. - Garnish and Serve:
Finally, garnish your cups with fresh herbs like rosemary or thyme to give them an aromatic touch. Once the cups are filled, they’re ready to serve!
Nutrition
- Serving Size: 8
- Calories: 250
- Fat: 18g
- Carbohydrates: 5g
- Protein: 12g
Conclusion
These individual charcuterie cups are not only a visually stunning way to serve snacks but also a practical and fun way to enjoy charcuterie without the hassle of a large spread. Whether you’re hosting a party, bringing snacks to a potluck, or just looking for a delightful snack on a busy day, these cups offer a perfect combination of convenience and deliciousness. With endless possibilities for customization, you can tailor each cup to your tastes and dietary needs, ensuring that everyone gets something they love. So grab your favorite meats, cheeses, and accompaniments, and get ready to create the ultimate personalized charcuterie experience—one bite at a time!