Introduction
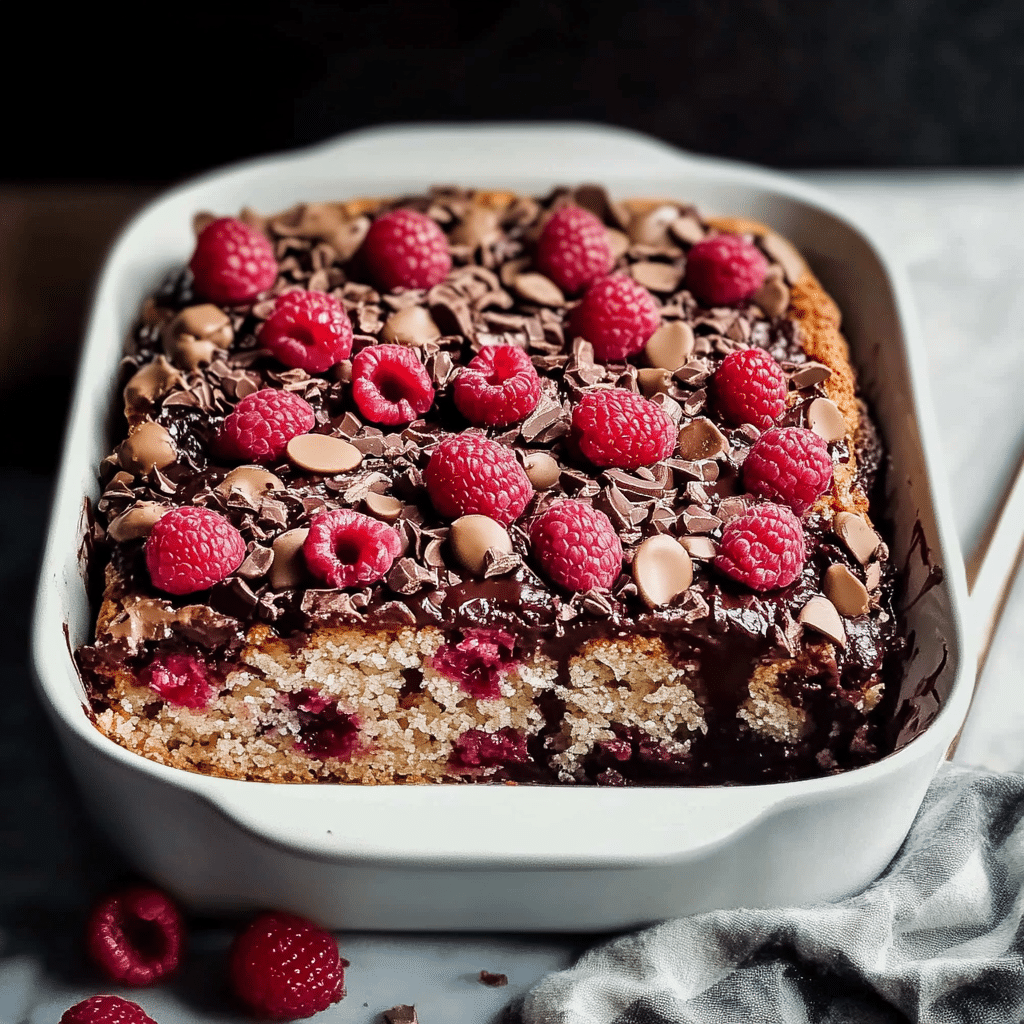
There’s something magical about the combination of rich, dark chocolate and tangy raspberries. Throw in the buttery, moist texture of a coffee cake, and you’ve got the perfect treat that’s sure to be a crowd-pleaser. This Dark Chocolate Raspberry Coffee Cake isn’t just a dessert; it’s an experience. The deep, cocoa flavor pairs perfectly with the bursts of raspberry, while the crumbly cake base gives it that melt-in-your-mouth texture you crave.
I first made this cake on a lazy Sunday morning when I was craving something indulgent but not too heavy. After a bit of experimenting, I nailed the perfect balance of rich chocolate and fruity raspberry. The result? A coffee cake that’s a little fancier than your typical one but still easy enough to whip up for breakfast or brunch. It’s the kind of treat you can enjoy with your morning coffee or serve as a show-stopping dessert for any gathering.
What I love most about this recipe is how versatile it is. You can make it ahead, keep it in the fridge, and it stays delicious for days. It’s also perfect for special occasions, like brunch with friends or family, or even just when you need a cozy treat. The deep chocolate flavor, the tangy raspberries, and the buttery cake layers come together in such a magical way that I’m sure it’ll become a new favorite in your kitchen too!
Why You’ll Love This Recipe
- Rich in flavor: The deep, dark chocolate and sweet-tart raspberries create a flavor explosion in every bite. It’s the perfect balance of bitterness from the chocolate and brightness from the berries.
- Moist and tender: The cake itself is so moist, thanks to the addition of sour cream and butter. It stays soft for days, making it great for make-ahead breakfasts or gatherings.
- A crowd-pleaser: Whether you’re serving it at a brunch or taking it to a potluck, this coffee cake is always a hit. The combination of dark chocolate and raspberry is universally loved.
- Flexible: You can make it with fresh raspberries or frozen ones, and the recipe is easily adaptable if you want to change up the fruit or even add a bit of nuts or swirl in some peanut butter for a fun twist.
Preparation Time and Servings
- Total Time: 1 hour and 15 minutes (includes prep and baking time).
- Servings: This recipe makes about 10-12 servings (depending on how big you slice your cake).
- Nutrition Facts:
- Calories per serving: 320
- Protein: 3g
- Carbs: 45g
- Fat: 15g
Ingredients
Cake:
- 2 ½ cups all-purpose flour
- 1 ½ teaspoons baking powder
- ½ teaspoon baking soda
- ½ teaspoon salt
- ¾ cup unsweetened cocoa powder (dark cocoa if you prefer a richer flavor)
- 1 ¼ cups granulated sugar
- 1 stick (½ cup) unsalted butter, softened
- 2 large eggs
- 1 cup sour cream (this helps keep the cake moist)
- 1 teaspoon vanilla extract
Swirl:
- 1 cup dark chocolate chips
- 1 cup fresh or frozen raspberries (lightly mashed)
- 2 tablespoons sugar (to sweeten the raspberries)
Topping:
- 2 tablespoons dark brown sugar
- ¼ cup chocolate chips (optional, for extra gooey goodness)
- A few raspberries for garnish (optional)
Why These Ingredients Matter:
- Sour cream: The addition of sour cream helps keep the cake super moist and adds richness to the flavor.
- Dark chocolate chips: These melt beautifully into the cake and provide that indulgent chocolate flavor we all love.
- Raspberries: They add a pop of color and a sweet-tart contrast that balances the richness of the chocolate.
- Butter: You can’t make a cake without butter—it’s what gives the cake its soft, rich crumb.
Step-by-Step Instructions
Step 1: Prep Your Ingredients
Start by preheating your oven to 350°F (175°C) and greasing a 9-inch round cake pan with butter or cooking spray. You’ll also want to line the bottom with parchment paper for easy removal once your cake is done.
In a medium bowl, whisk together the flour, baking powder, baking soda, salt, and cocoa powder. Set it aside for now.
In a separate large bowl, cream together the butter and sugar until light and fluffy. This step is important, so don’t rush it—about 2-3 minutes of mixing will give you the best texture. Add the eggs one at a time, mixing well after each addition. Stir in the vanilla extract. Now, slowly add the dry ingredients in three parts, alternating with the sour cream. Start and end with the dry ingredients. Mix gently after each addition—overmixing here can make the cake tough, and we want it nice and soft.
Step 2: Prepare the Raspberry Chocolate Swirl
In a small saucepan, heat the chocolate chips over low heat until melted, stirring constantly to prevent burning. Once melted, remove from the heat. In a small bowl, mash the raspberries gently with a fork and stir in the sugar.
Now it’s time to assemble! Pour half of the batter into the prepared pan. Drop spoonfuls of the melted chocolate over the batter, then spoon on some of the mashed raspberries. Use a butter knife to swirl everything together. Pour the remaining batter on top and repeat the process with the chocolate and raspberries.
Step 3: Add the Topping
For the topping, simply sprinkle the dark brown sugar and extra chocolate chips over the top of the cake. This will create a beautiful, caramelized, chocolatey crunch on the top of your cake once it bakes.
Step 4: Bake
Bake the cake for about 45-50 minutes, or until a toothpick inserted into the center comes out clean (make sure it’s not touching any chocolate). Check the cake at around 40 minutes—if it’s browning too much, cover it loosely with foil for the remaining baking time.
Step 5: Cool and Serve
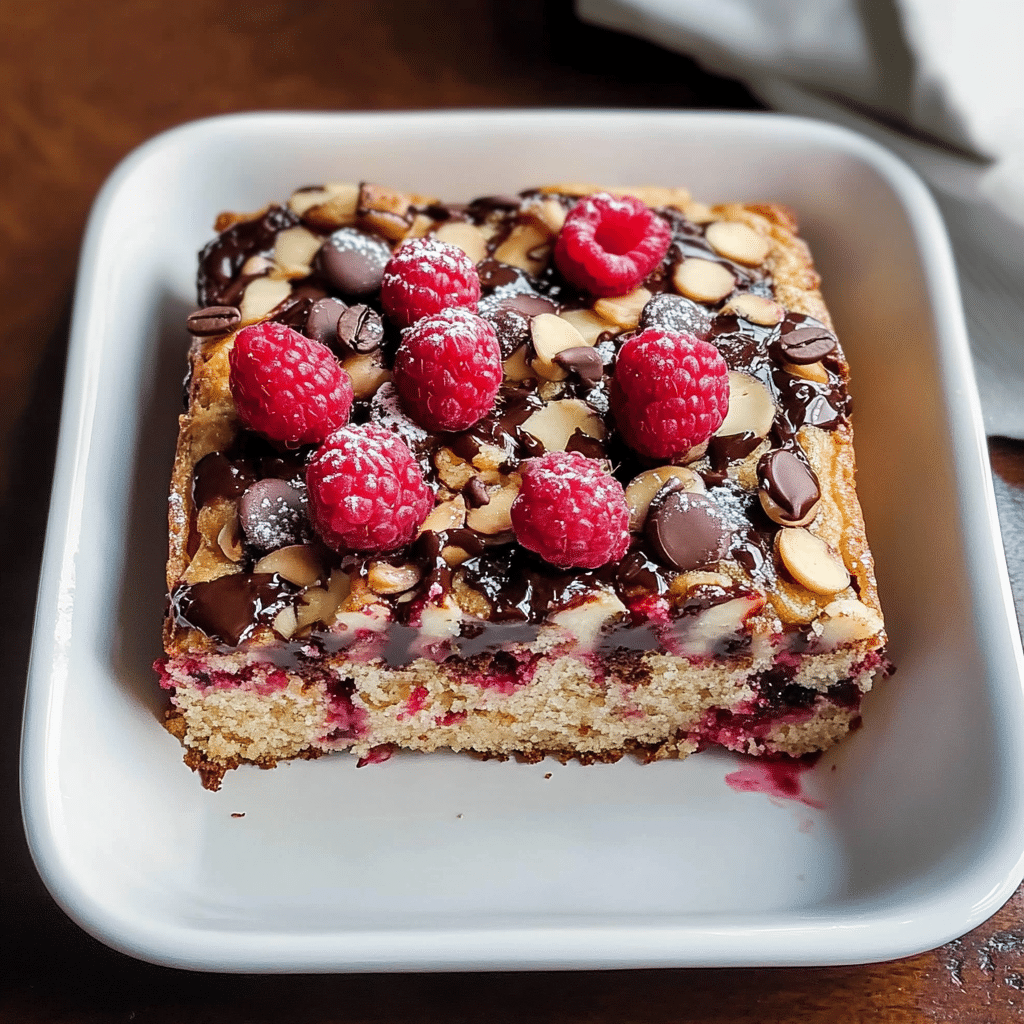
Once the cake is done, let it cool in the pan for about 10 minutes before transferring it to a wire rack. If you used parchment paper, this should be a breeze. Allow it to cool completely before slicing and serving. If you want an extra touch, top the cake with fresh raspberries and a drizzle of melted chocolate.
How to Serve
This Dark Chocolate Raspberry Coffee Cake is perfect on its own, but you can make it even more special with a few serving ideas:
- Top with a dollop of whipped cream for extra indulgence.
- Pair it with a cup of coffee or hot chocolate for a cozy breakfast or dessert.
- Serve with vanilla ice cream for a decadent dessert option.
- Garnish with mint leaves or powdered sugar for a pop of color.
Additional Tips
- Use Room Temperature Ingredients: Make sure your butter, eggs, and sour cream are at room temperature. This helps them combine better, giving you a smoother batter and a fluffier cake.
- Don’t Overmix the Batter: It’s tempting to mix the batter too much, but doing so will result in a dense cake. Mix just until combined for a light and airy texture.
- Swirl, Don’t Stir: When adding the chocolate and raspberry swirls, be gentle! You want to create a beautiful marbled effect, not mix it all the way through.
- Test for Doneness: Every oven is different, so start checking the cake at 40 minutes. If it’s not done, continue baking, but keep an eye on it to prevent burning.
- Freeze Leftovers: This cake freezes beautifully. Simply wrap it in plastic wrap and store it in an airtight container for up to 2-3 months. To reheat, simply pop it in the microwave for a few seconds or warm it up in the oven.
Recipe Variations
While this cake is amazing as is, there are so many fun variations you can try to make it your own:
- Add Nuts: For some extra texture, sprinkle in some chopped walnuts or almonds with the chocolate swirl. It’ll add a lovely crunch.
- Use Other Berries: Swap the raspberries for blackberries, strawberries, or blueberries if you prefer a different flavor profile.
- Go Vegan: Use a dairy-free butter substitute, flax eggs, and non-dairy sour cream to make this cake completely vegan.
- Spice it Up: Add a teaspoon of cinnamon or a pinch of nutmeg to the dry ingredients for a warming, spiced cake.
- Cheesecake Filling: For a richer, more decadent treat, you can layer a cheesecake filling in the middle of the cake. Simply mix cream cheese, sugar, and an egg for a creamy surprise inside.
Frequently Asked Questions (FAQ)
1. Can I use frozen raspberries instead of fresh ones?
Yes, absolutely! Frozen raspberries work just as well as fresh raspberries in this recipe. If you’re using frozen berries, make sure to thaw them first and drain off any excess moisture to prevent the cake from becoming too wet. You might also want to lightly mash them to get that perfect swirl.
2. How can I make the cake less sweet?
If you prefer a less sweet cake, you can reduce the sugar in the batter by about ¼ cup. Keep in mind that the raspberries and chocolate chips will still add some sweetness, so it’ll still have that lovely balance without being overly sugary.
3. Can I make this coffee cake gluten-free?
Yes, you can make this cake gluten-free! Simply swap the all-purpose flour for a 1:1 gluten-free flour blend. Make sure to also use gluten-free baking powder and soda to ensure the recipe stays completely gluten-free. The texture might be slightly different, but it will still be delicious.
4. How do I store leftovers?
Store any leftover cake in an airtight container at room temperature for up to 3 days. If you want to keep it longer, you can freeze it. Just wrap individual slices in plastic wrap or foil and place them in a freezer bag. To thaw, let it sit at room temperature for an hour or warm it up in the microwave for a few seconds.
5. Can I make this cake ahead of time?
Yes! This cake actually gets better after it rests for a day. You can make it a day ahead and store it at room temperature. Just be sure to cover it well with plastic wrap or place it in an airtight container to keep it fresh. It’s a perfect make-ahead treat for brunch or gatherings!
Print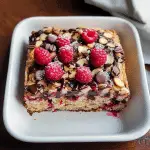
Dark Chocolate Raspberry Coffee Cake
- Total Time: 1 hour
Ingredients
For the Cake:
- 2 ½ cups all-purpose flour
- 1 ½ teaspoons baking powder
- ½ teaspoon baking soda
- ½ teaspoon salt
- ¾ cup unsweetened cocoa powder (dark cocoa if you prefer a richer flavor)
- 1 ¼ cups granulated sugar
- 1 stick (½ cup) unsalted butter, softened
- 2 large eggs
- 1 cup sour cream (this helps keep the cake moist)
- 1 teaspoon vanilla extract
For the Swirl:
- 1 cup dark chocolate chips
- 1 cup fresh or frozen raspberries (lightly mashed)
- 2 tablespoons sugar (to sweeten the raspberries)
For the Topping:
- 2 tablespoons dark brown sugar
- ¼ cup chocolate chips (optional, for extra gooey goodness)
- A few raspberries for garnish (optional)
Instructions
Step 1: Prep Your Ingredients
Start by preheating your oven to 350°F (175°C) and greasing a 9-inch round cake pan with butter or cooking spray. You’ll also want to line the bottom with parchment paper for easy removal once your cake is done.
In a medium bowl, whisk together the flour, baking powder, baking soda, salt, and cocoa powder. Set it aside for now.
In a separate large bowl, cream together the butter and sugar until light and fluffy. This step is important, so don’t rush it—about 2-3 minutes of mixing will give you the best texture. Add the eggs one at a time, mixing well after each addition. Stir in the vanilla extract. Now, slowly add the dry ingredients in three parts, alternating with the sour cream. Start and end with the dry ingredients. Mix gently after each addition—overmixing here can make the cake tough, and we want it nice and soft.
Step 2: Prepare the Raspberry Chocolate Swirl
In a small saucepan, heat the chocolate chips over low heat until melted, stirring constantly to prevent burning. Once melted, remove from the heat. In a small bowl, mash the raspberries gently with a fork and stir in the sugar.
Now it’s time to assemble! Pour half of the batter into the prepared pan. Drop spoonfuls of the melted chocolate over the batter, then spoon on some of the mashed raspberries. Use a butter knife to swirl everything together. Pour the remaining batter on top and repeat the process with the chocolate and raspberries.
Step 3: Add the Topping
For the topping, simply sprinkle the dark brown sugar and extra chocolate chips over the top of the cake. This will create a beautiful, caramelized, chocolatey crunch on the top of your cake once it bakes.
Step 4: Bake
Bake the cake for about 45-50 minutes, or until a toothpick inserted into the center comes out clean (make sure it’s not touching any chocolate). Check the cake at around 40 minutes—if it’s browning too much, cover it loosely with foil for the remaining baking time.
Step 5: Cool and Serve
Once the cake is done, let it cool in the pan for about 10 minutes before transferring it to a wire rack. If you used parchment paper, this should be a breeze. Allow it to cool completely before slicing and serving. If you want an extra touch, top the cake with fresh raspberries and a drizzle of melted chocolate.
Nutrition
- Serving Size: 12
- Calories: 320
- Fat: 15g
- Carbohydrates: 45g
- Protein: 3g
Conclusion
This Dark Chocolate Raspberry Coffee Cake is more than just a delicious dessert; it’s the kind of recipe you’ll want to make again and again. The rich chocolate, tart raspberries, and buttery, moist cake will win you over with every bite. Whether you’re enjoying it for breakfast with a cup of coffee or as an after-dinner treat, it’s sure to impress. The best part is, you can easily customize it to your liking and make it your own. It’s a perfect recipe for when you want to treat yourself (and others) to something special without spending all day in the kitchen. Enjoy!