Introduction
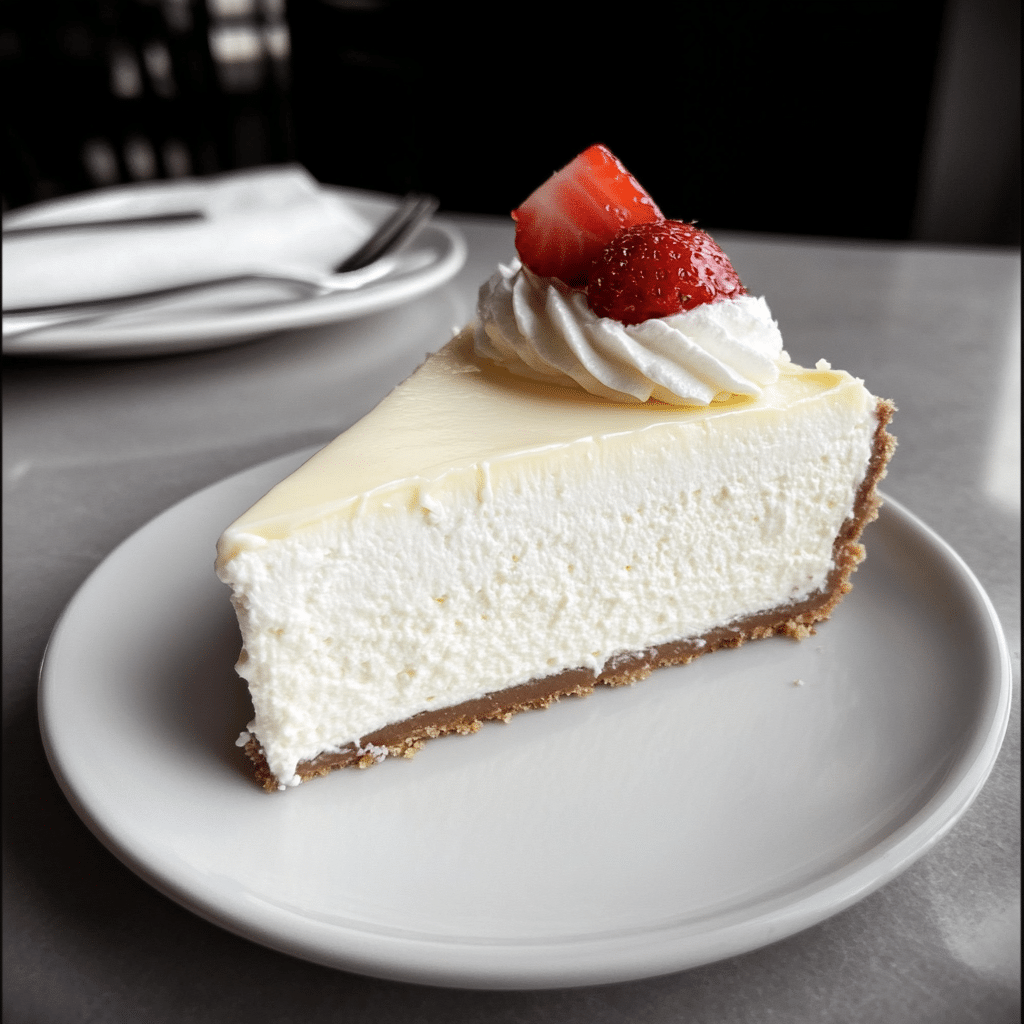
There’s something magical about a Classic New York Cheesecake. When I think about the perfect cheesecake, my mind instantly goes to that iconic, velvety smooth texture, the slightly tangy flavor, and the golden, slightly crisp crust that holds everything together. If you’ve ever had a bite of authentic New York cheesecake, you know that it’s not just dessert—it’s an experience. And today, I’m sharing the recipe for my favorite cheesecake that’s creamy, rich, and truly unforgettable.
I’ve always loved cheesecake, but it wasn’t until I first tried a real New York cheesecake that I truly understood what makes it stand out. I had it at a little café in Manhattan, and after that, there was no turning back. It’s the balance of textures—the dense, creamy filling with just the right amount of tang from the cream cheese, paired with the buttery crunch of the graham cracker crust. Over the years, I’ve perfected this recipe to make it as close to that unforgettable experience as possible.
Whether you’re making it for a special occasion or just because you want to treat yourself (which is absolutely reason enough), this Classic New York Cheesecake is the perfect dessert. Trust me, once you try it, you’ll never look at cheesecake the same way again.
Why You’ll Love This Recipe
Why should this Classic New York Cheesecake be your go-to dessert recipe? Let me count the ways!
- Creamy and Rich: The filling is luxuriously creamy with just the right amount of tanginess, thanks to the perfect balance of cream cheese, sour cream, and a hint of vanilla.
- Simple Ingredients: You don’t need fancy equipment or hard-to-find ingredients. Just a few basic items, and you’ll have a decadent cheesecake.
- Perfect for Any Occasion: Whether it’s for a birthday, holiday, or a weekend treat, this cheesecake is guaranteed to impress your friends and family.
- Classic Flavor: There’s something timeless about New York cheesecake that makes it a favorite. The simple yet rich flavors never go out of style, and everyone will be asking for the recipe.
What I love most about this cheesecake is how it’s the perfect balance between rich and refreshing. The creamy filling is indulgent, but the tartness from the sour cream and the fresh lemon zest give it just the right amount of brightness. When you take that first bite, it’s a little piece of cheesecake heaven.
Preparation Time and Servings
- Total Time: 5 hours (15 minutes prep, 1 hour baking, 3-4 hours cooling)
- Servings: This recipe serves 10-12 people, depending on how large you cut your slices.
Nutrition Facts (per serving):
- Calories: 400
- Protein: 8g
- Carbs: 35g
- Fat: 28g
- Sugar: 28g
Ingredients
Here’s everything you need to make your cheesecake dream come true:
For the Crust:
- 1 1/2 cups graham cracker crumbs: This is the base of your cheesecake crust, providing that perfect buttery crunch.
- 1/4 cup sugar: Sweetens the crust just enough.
- 1/2 cup unsalted butter (melted): Brings it all together, giving you that delicious, golden crust.
- 1/2 teaspoon cinnamon (optional): Adds a hint of warmth to the crust.
For the Filling:
- 4 (8-ounce) packages cream cheese (softened): The star of the show, giving your cheesecake that creamy, smooth texture.
- 1 1/4 cups granulated sugar: Sweetens the filling without overpowering the cream cheese flavor.
- 1/4 cup sour cream: Adds a tangy richness that complements the sweetness of the cream cheese.
- 1 teaspoon vanilla extract: For that classic cheesecake flavor.
- 3 large eggs (room temperature): Helps set the filling without making it too firm.
- 2 tablespoons all-purpose flour: Provides a bit of structure to the filling.
- 1 tablespoon lemon zest: Brightens up the flavor and gives it that fresh zing.
Step-by-Step Instructions
1st Step: Prepare the crust
Preheat your oven to 325°F (163°C). Start by preparing the graham cracker crust. In a medium bowl, combine the graham cracker crumbs, sugar, melted butter, and cinnamon (if you’re using it). Stir everything together until the crumbs are evenly coated and the mixture feels like wet sand.
Next, press the mixture into the bottom of a 9-inch springform pan, making sure it’s even and compact. You can use the back of a spoon to press it down firmly. Bake the crust in the preheated oven for about 10 minutes, or until it’s golden and fragrant. Once done, remove it from the oven and let it cool while you prepare the filling.
Step 2: Prepare the filling
In a large bowl, beat the softened cream cheese with an electric mixer on medium speed until it’s smooth and free of lumps. This will take about 3-4 minutes. Make sure the cream cheese is softened so it blends easily without creating lumps.
Next, add the sugar and beat until the mixture is light and creamy. Scrape down the sides of the bowl to make sure everything is incorporated. Add the sour cream, vanilla extract, flour, and lemon zest. Beat again until everything is combined.
One by one, add the eggs, mixing well after each addition. Be careful not to overmix once the eggs are added; you want to keep the batter smooth but not overworked. Once all the eggs are incorporated, you should have a smooth, creamy cheesecake filling.
3rd Step: Assemble the cheesecake
Pour the cheesecake filling into the cooled crust, spreading it evenly with a spatula. Smooth the top of the cheesecake, making sure there are no air bubbles.
4th Step: Bake the cheesecake
Place the cheesecake in the center of the oven and bake for 55-60 minutes, or until the edges are set and the center is still slightly jiggly. Don’t worry if it seems a little wobbly in the center; it will firm up as it cools.
After the baking time is up, turn off the oven and crack the oven door slightly. Let the cheesecake cool in the oven for 1 hour. This step helps prevent cracks from forming on the surface of the cheesecake.
5th Step: Chill the cheesecake
After the cheesecake has cooled in the oven, remove it and place it on the counter to cool for another 30 minutes. Then, transfer the cheesecake to the fridge and let it chill for at least 4 hours, or overnight for best results. The longer it chills, the better the flavors will set!
6th Step: Serve and enjoy
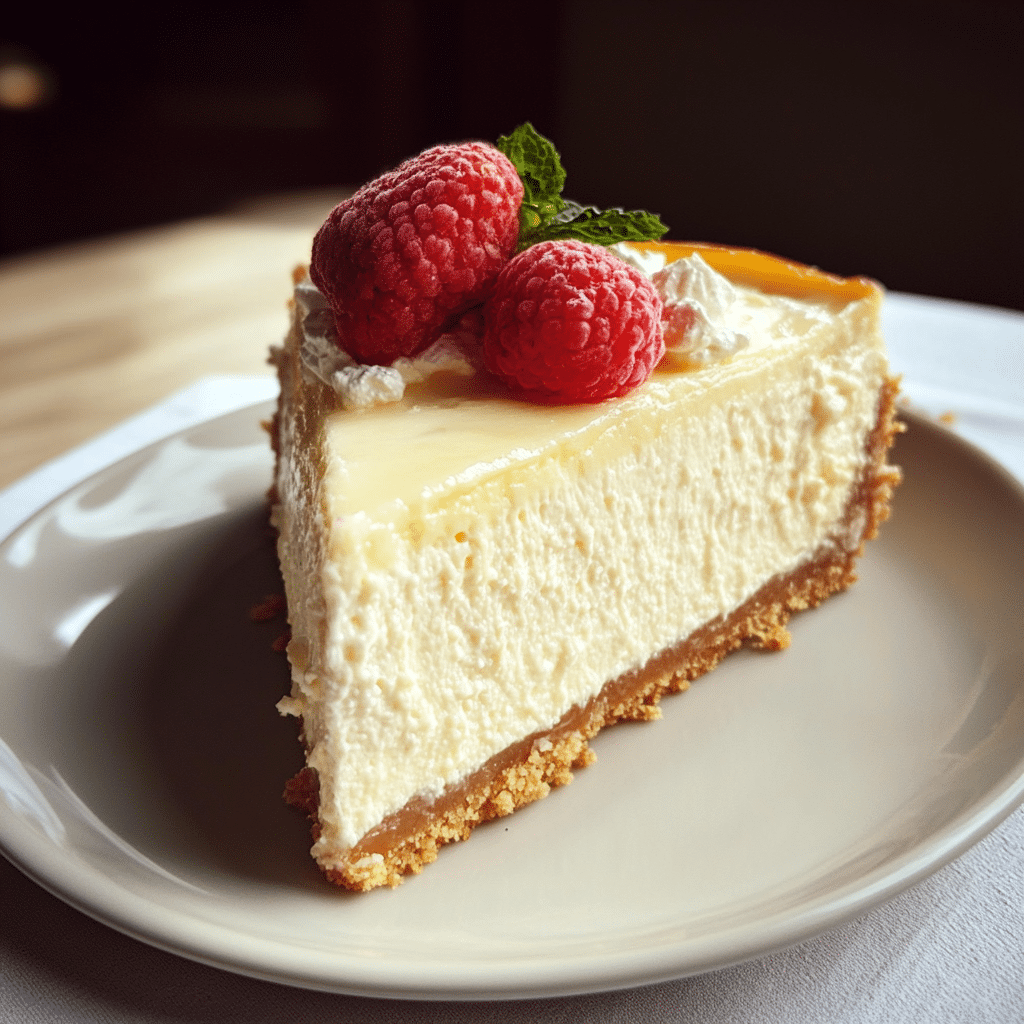
Once the cheesecake has chilled, remove it from the springform pan and place it on a serving platter. You can garnish it with fresh fruit, whipped cream, or even a drizzle of caramel sauce, but honestly, it’s perfect as is. Slice it up, serve, and enjoy every creamy, dreamy bite!
How to Serve
Here are a few ways to serve your cheesecake:
- Classic: Serve it as-is with a dollop of whipped cream on top for that traditional touch.
- Fruit Topping: Add a simple topping of fresh berries, such as strawberries, blueberries, or raspberries, for a burst of freshness.
- Caramel Drizzle: Drizzle some caramel sauce over each slice for an extra layer of sweetness.
- Chocolate Ganache: Pour over some smooth chocolate ganache if you’re feeling a little extra indulgent.
Additional Tips
- Use Room Temperature Ingredients: Make sure your cream cheese and eggs are at room temperature before you begin. This ensures a smoother batter and prevents lumps from forming in your filling.
- Prevent Cracks: If you’re worried about cracks, you can bake the cheesecake in a water bath. Wrap the bottom of the springform pan in aluminum foil to prevent water from seeping in, and place the pan in a larger pan filled with about an inch of hot water.
- Chill Overnight: For the best texture, chill the cheesecake overnight. It allows the flavors to meld together and gives the cheesecake a firm, perfect slice.
- Crack Prevention: If you do get cracks, don’t fret! You can cover them up with a layer of sour cream topping or fruit.
- Avoid Overmixing: Once the eggs are added, be careful not to overmix. Overmixing can lead to cracks and a denser texture.
Recipe Variations
If you’re looking to mix it up, here are some ideas to personalize your cheesecake:
- Chocolate Cheesecake: Add 1/2 cup of cocoa powder to the batter for a rich, chocolatey version of this classic.
- Swirl Flavor: Swirl in fruit purees, like raspberry or strawberry, to add color and a burst of flavor to the filling.
- Lemon Cheesecake: Increase the lemon zest and add 1 tablespoon of lemon juice for a more pronounced citrus flavor.
- Coffee Cheesecake: Add 2 teaspoons of instant coffee to the filling for a coffee-flavored twist.
Frequently Asked Questions (FAQ)
Q: Can I make this cheesecake ahead of time?
A: Yes! In fact, making the cheesecake a day ahead is highly recommended. It gives the cheesecake time to set and allows the flavors to meld together beautifully. Simply refrigerate it for at least 4 hours, but overnight is even better. Just be sure to cover it with plastic wrap or a cake dome to keep it fresh.
Q: Can I use a different crust for my cheesecake?
A: Absolutely! While graham cracker crust is the classic choice, you can experiment with other crusts such as crushed cookies (like Oreos, digestive biscuits, or vanilla wafers), nuts, or even a shortbread cookie crust. Just make sure to adjust the quantity based on the type of crust you choose, as some may require more or less butter to hold together.
Q: How do I prevent my cheesecake from cracking?
A: Cracks can happen, but there are a few ways to minimize the risk:
- Don’t overmix the batter, especially after adding the eggs, as this can incorporate too much air and cause cracks.
- Bake at a low temperature (325°F or 163°C) to ensure even cooking without sudden changes in temperature.
- Let the cheesecake cool gradually by leaving the oven door ajar for about an hour after baking. Then, let it cool at room temperature before refrigerating.
- Use a water bath (optional): Wrap the bottom of your springform pan with aluminum foil to prevent water from seeping in, then place the pan in a larger baking dish filled with an inch of hot water. This helps create even heat around the cheesecake, reducing the chance of cracks.
Classic New York Cheesecake
- Total Time: 5 hours
Ingredients
For the Crust:
- 1 1/2 cups graham cracker crumbs: This is the base of your cheesecake crust, providing that perfect buttery crunch.
- 1/4 cup sugar: Sweetens the crust just enough.
- 1/2 cup unsalted butter (melted): Brings it all together, giving you that delicious, golden crust.
- 1/2 teaspoon cinnamon (optional): Adds a hint of warmth to the crust.
For the Filling:
- 4 (8-ounce) packages cream cheese (softened): The star of the show, giving your cheesecake that creamy, smooth texture.
- 1 1/4 cups granulated sugar: Sweetens the filling without overpowering the cream cheese flavor.
- 1/4 cup sour cream: Adds a tangy richness that complements the sweetness of the cream cheese.
- 1 teaspoon vanilla extract: For that classic cheesecake flavor.
- 3 large eggs (room temperature): Helps set the filling without making it too firm.
- 2 tablespoons all-purpose flour: Provides a bit of structure to the filling.
- 1 tablespoon lemon zest: Brightens up the flavor and gives it that fresh zing.
Instructions
Step 1: Prepare the crust
Preheat your oven to 325°F (163°C). Start by preparing the graham cracker crust. In a medium bowl, combine the graham cracker crumbs, sugar, melted butter, and cinnamon (if you’re using it). Stir everything together until the crumbs are evenly coated and the mixture feels like wet sand.
Next, press the mixture into the bottom of a 9-inch springform pan, making sure it’s even and compact. You can use the back of a spoon to press it down firmly. Bake the crust in the preheated oven for about 10 minutes, or until it’s golden and fragrant. Once done, remove it from the oven and let it cool while you prepare the filling.
Step 2: Prepare the filling
In a large bowl, beat the softened cream cheese with an electric mixer on medium speed until it’s smooth and free of lumps. This will take about 3-4 minutes. Make sure the cream cheese is softened so it blends easily without creating lumps.
Next, add the sugar and beat until the mixture is light and creamy. Scrape down the sides of the bowl to make sure everything is incorporated. Add the sour cream, vanilla extract, flour, and lemon zest. Beat again until everything is combined.
One by one, add the eggs, mixing well after each addition. Be careful not to overmix once the eggs are added; you want to keep the batter smooth but not overworked. Once all the eggs are incorporated, you should have a smooth, creamy cheesecake filling.
Step 3: Assemble the cheesecake
Pour the cheesecake filling into the cooled crust, spreading it evenly with a spatula. Smooth the top of the cheesecake, making sure there are no air bubbles.
Step 4: Bake the cheesecake
Place the cheesecake in the center of the oven and bake for 55-60 minutes, or until the edges are set and the center is still slightly jiggly. Don’t worry if it seems a little wobbly in the center; it will firm up as it cools.
After the baking time is up, turn off the oven and crack the oven door slightly. Let the cheesecake cool in the oven for 1 hour. This step helps prevent cracks from forming on the surface of the cheesecake.
Step 5: Chill the cheesecake
After the cheesecake has cooled in the oven, remove it and place it on the counter to cool for another 30 minutes. Then, transfer the cheesecake to the fridge and let it chill for at least 4 hours, or overnight for best results. The longer it chills, the better the flavors will set!
Step 6: Serve and enjoy
Once the cheesecake has chilled, remove it from the springform pan and place it on a serving platter. You can garnish it with fresh fruit, whipped cream, or even a drizzle of caramel sauce, but honestly, it’s perfect as is. Slice it up, serve, and enjoy every creamy, dreamy bite!
- Prep Time: 15 minutes
Nutrition
- Serving Size: 12
- Calories: 400
- Sugar: 28g
- Fat: 28g
- Carbohydrates: 35g
- Protein: 8g
Conclusion
A Classic New York Cheesecake is truly a dessert that stands the test of time. Whether you’re making it for a celebration or simply because you want to treat yourself, this cheesecake is sure to impress. The creamy filling, perfectly baked with just the right tanginess, combined with the buttery graham cracker crust, makes for a decadent dessert that’s worth every bite. Plus, with just a few simple ingredients and easy-to-follow steps, you can make this cheesecake right at home. So go ahead, preheat your oven, and indulge in this creamy, dreamy classic—your taste buds will thank you!