Introduction: A Cookie That Feels Like Home
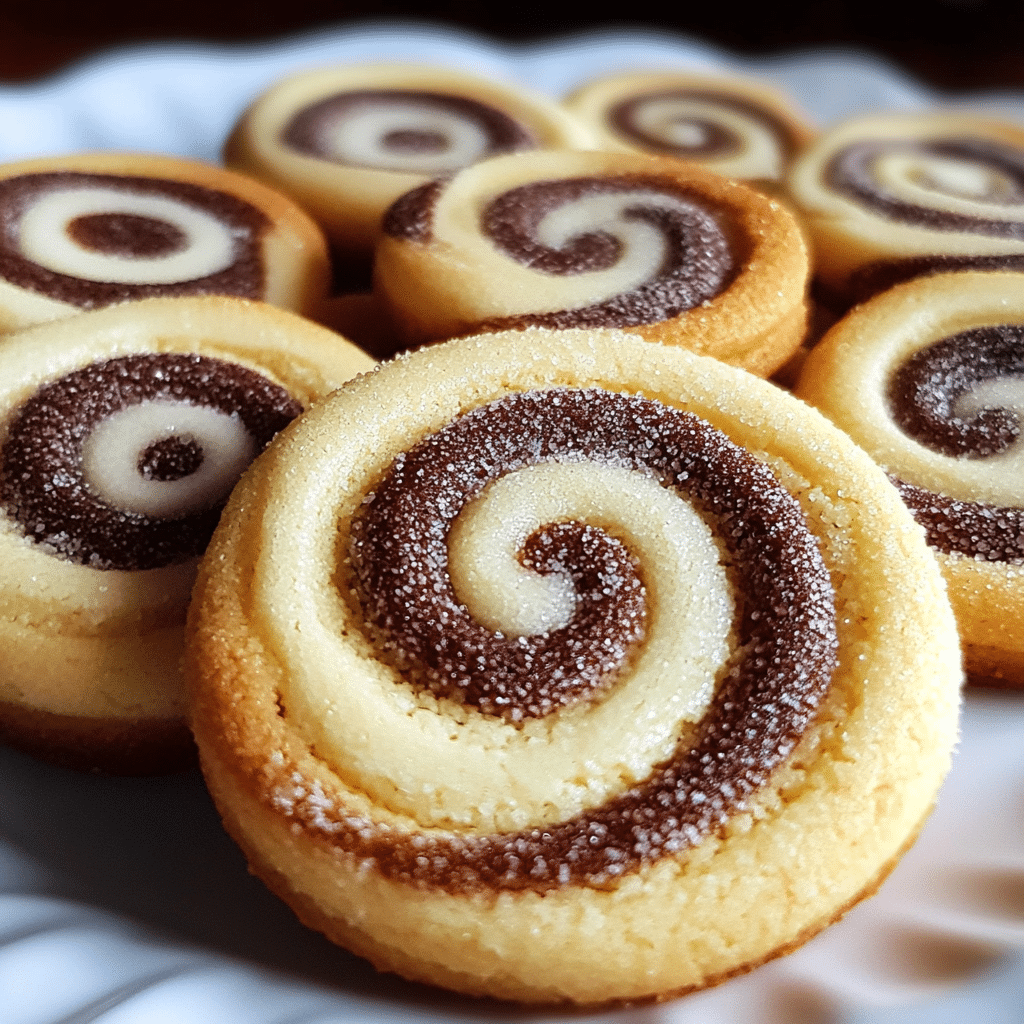
There’s something magical about a butter cookie, isn’t there? The way it crumbles just right, the rich flavor that fills your senses with each bite—it’s like a hug in cookie form. If you’re a fan of buttery, melt-in-your-mouth goodness, then you’re in for a treat today with these Butter Swirl Cookies.
This recipe is perfect for those days when you crave something simple, comforting, and absolutely delicious. They’re not overly complicated to make, but they deliver that classic buttery flavor with an irresistible twist. Plus, the swirl effect? It’s not only pretty, but it adds an extra layer of flavor and texture that makes each bite feel like a little moment of joy.
I first discovered the beauty of these cookies when I was experimenting with different flavors for the holidays. I wanted something that could stand out without being too fussy—and that’s when these butter swirl cookies became my go-to. My family absolutely loves them, and they’ve become a staple in our home, especially during those cozy afternoons with a warm cup of tea.
Trust me, whether you’re an experienced baker or a beginner, you can totally nail this recipe. The swirl might sound fancy, but it’s incredibly simple once you get the hang of it. And before you know it, you’ll have a batch of beautiful, buttery cookies that everyone will adore.
Why You’ll Love These Butter Swirl Cookies
Let’s be real for a second—who doesn’t love a good butter cookie? But what makes these butter swirl cookies extra special? Here are a few reasons you’re going to fall head over heels for this recipe:
- Simple Ingredients: We’re talking pantry staples here—flour, butter, sugar, vanilla, and a little bit of love. That’s it!
- Perfectly Buttery: The flavor is rich, but not overwhelming. It’s just enough to make your taste buds dance.
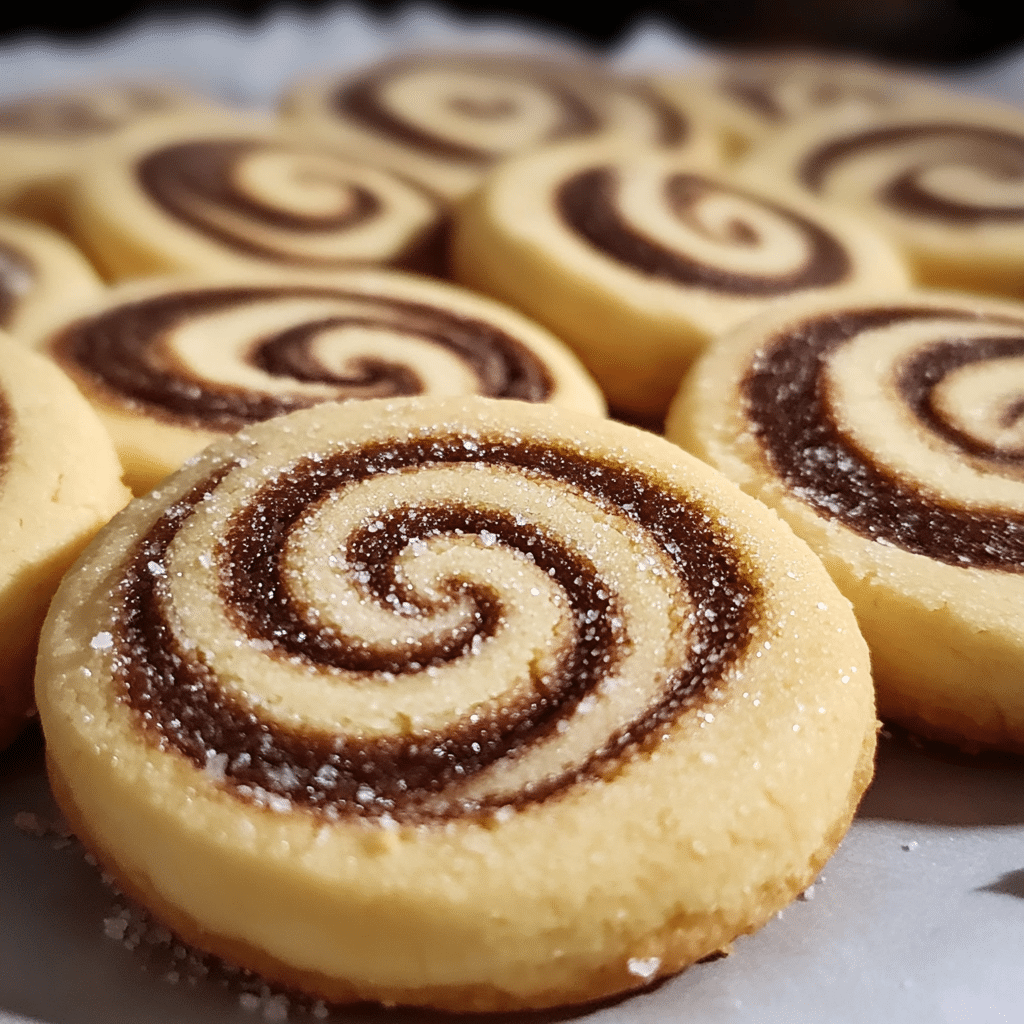
- The Swirl Magic: The swirl of dough makes these cookies stand out. They’re not just tasty, they’re eye-catching, too.
- Family-Friendly: Kids and adults alike love them, so they’re perfect for all your cookie-sharing needs.
- Make Ahead: These cookies are great for making ahead and freezing. No need to stress when you need a last-minute dessert!
The best part? They’re so easy to make, and the results are chef’s kiss perfect every single time. So, let’s get to baking, shall we?
Preparation Time and Servings
- Total Time: About 1 hour (including chilling time)
- Servings: Makes about 24 cookies (depending on size)
Nutrition Facts
(Per cookie, based on a 24-cookie batch)
- Calories: 150
- Carbs: 20g
- Protein: 2g
- Fat: 7g
- Sugar: 8g
Ingredients
Let’s talk ingredients. These are your go-to pantry items, so I bet you have most of them at home already. Here’s what you’ll need:
- 2 ½ cups all-purpose flour
- 1 cup unsalted butter, softened
- ¾ cup granulated sugar
- 1 teaspoon vanilla extract
- 1 egg
- ¼ teaspoon salt
- ½ teaspoon baking powder
- ¼ cup cocoa powder (for the swirl effect)
Why These Ingredients Matter
- Butter: The star of the show! It’s what gives these cookies their rich, melt-in-your-mouth flavor. Make sure it’s softened but not melted for the best texture.
- Granulated sugar: Adds just the right amount of sweetness without being too overpowering.
- Vanilla extract: This adds warmth and depth of flavor to the cookies.
- Flour: The base that holds everything together.
- Cocoa powder: This gives the cookies their beautiful swirl and a touch of extra richness. It’s totally optional if you want to keep things simple, but it adds a lovely depth to the flavor.
Step-by-Step Instructions
Now, let’s get baking! Follow these simple steps, and you’ll have perfectly swirled butter cookies in no time.
- Preheat the Oven
Preheat your oven to 350°F (175°C) and line two baking sheets with parchment paper. This is essential because it prevents the cookies from sticking and ensures an even bake. - Cream the Butter and Sugar
In a large bowl, cream together the softened butter and granulated sugar using an electric mixer or a whisk. Mix on medium speed for about 3-4 minutes until the mixture is light and fluffy. This step is important because it helps create the perfect texture for the cookies. - Add the Egg and Vanilla
Crack in the egg and add the vanilla extract. Mix again until combined. The egg helps bind everything together, and the vanilla gives the cookies that comforting flavor we all know and love. - Combine the Dry Ingredients
In a separate bowl, whisk together the flour, salt, and baking powder. Gradually add this dry mixture to the wet ingredients, stirring until the dough starts to come together. You might need to use your hands to knead it just a little bit to get everything evenly mixed. - Divide the Dough
Once the dough is ready, divide it in half. Keep one half plain, and place the other half into a separate bowl. - Make the Chocolate Swirl
Add cocoa powder to the second half of the dough and mix until fully incorporated. This will create your beautiful swirl effect. Don’t worry if the dough looks a little crumbly at first—the cocoa powder can be a bit tricky, but just keep working it until it comes together. - Chill the Dough
Wrap both doughs in plastic wrap and chill in the refrigerator for 30 minutes. This step is crucial because it helps the dough firm up and makes it easier to roll out. - Roll the Dough
After the dough has chilled, remove it from the fridge. On a lightly floured surface, roll out the plain dough into a rectangle shape. Then do the same with the chocolate dough. You want them to be about the same size so they can fit together perfectly. - Create the Swirl
Lay the chocolate dough on top of the plain dough, then gently roll them together into a log shape. Make sure it’s tight but not too tight, as you don’t want to squish the dough out. - Slice and Bake
Slice the dough log into approximately ¼-inch thick rounds. Place the slices on the prepared baking sheets, leaving about an inch of space between each cookie.Bake the cookies for 10-12 minutes, or until the edges are golden. They will continue to cook slightly as they cool, so don’t worry if they seem a little soft at first. - Cool and Enjoy!
Let the cookies cool on the baking sheet for about 5 minutes before transferring them to a wire rack to cool completely. This gives them time to firm up and get that perfect texture.
How to Serve
These Butter Swirl Cookies are perfect on their own, but if you’re feeling fancy, here are some serving suggestions:
- With a warm cup of tea: There’s something about a buttery cookie and a steaming cup of tea that feels so comforting.
- Stacked with frosting: For a more decadent treat, sandwich these cookies with a bit of vanilla buttercream frosting.
- With a scoop of ice cream: Let’s be real—cookies and ice cream are a match made in heaven. A scoop of vanilla or chocolate ice cream pairs beautifully with these buttery cookies.
Additional Tips for Perfect Cookies
- Don’t Overmix: When you’re combining the wet and dry ingredients, be sure not to overmix the dough. Overmixing can lead to tough cookies. You want to mix just until everything is incorporated.
- Chill the Dough: Don’t skip the chilling step. Chilled dough is key to getting those beautiful, defined swirls.
- Use Softened Butter: Make sure your butter is softened to room temperature. If it’s too hard or melted, it won’t create that light, fluffy texture.
- Watch the Baking Time: Every oven is different, so keep an eye on the cookies as they bake. The edges should be golden brown, and the centers should look set but slightly soft.
- Let the Cookies Cool Completely: This will help them firm up and become perfectly crispy around the edges while remaining soft in the center.
Recipe Variations
- Make it Gluten-Free: Swap the all-purpose flour with a gluten-free flour blend to make these cookies gluten-free.
- Vegan Version: You can substitute the butter with vegan butter and the egg with a flax egg (1 tablespoon ground flaxseed + 3 tablespoons water).
- Add Sprinkles: If you’re baking these for a special occasion, add sprinkles on top before baking for a colorful touch.
- Nutty Swirl: Try adding chopped nuts like pecans or walnuts to the dough for a delightful crunch.
Freezing and Storage
These cookies are great for making ahead or storing for later!
- Storage: Store the cooled cookies in an airtight container at room temperature for up to 1 week.
- Freezing: You can freeze the dough before baking. Just slice the dough into rounds and freeze them on a baking sheet. Once frozen, transfer the slices to a freezer bag for up to 3 months. When ready to bake, simply place the frozen dough on a baking sheet and bake for 1-2 extra minutes.
FAQ Section
- Can I use salted butter instead of unsalted butter?
You can, but I recommend unsalted butter to control the amount of salt in the cookies. If you do use salted butter, omit the additional salt from the recipe. - Can I add chocolate chips to the dough?
Absolutely! If you’re a chocolate lover, sprinkle some chocolate chips into the dough for extra decadence. - How can I make the swirl more defined?
If you want the swirl to be even more pronounced, try rolling the dough tighter when shaping the log.

Butter Swirl Cookies
- Total Time: 1 hour
Ingredients
- 2 ½ cups all-purpose flour
- 1 cup unsalted butter, softened
- ¾ cup granulated sugar
- 1 teaspoon vanilla extract
- 1 egg
- ¼ teaspoon salt
- ½ teaspoon baking powder
- ¼ cup cocoa powder (for the swirl effect)
Instructions
- Preheat the Oven
Preheat your oven to 350°F (175°C) and line two baking sheets with parchment paper. This is essential because it prevents the cookies from sticking and ensures an even bake. - Cream the Butter and Sugar
In a large bowl, cream together the softened butter and granulated sugar using an electric mixer or a whisk. Mix on medium speed for about 3-4 minutes until the mixture is light and fluffy. This step is important because it helps create the perfect texture for the cookies. - Add the Egg and Vanilla
Crack in the egg and add the vanilla extract. Mix again until combined. The egg helps bind everything together, and the vanilla gives the cookies that comforting flavor we all know and love. - Combine the Dry Ingredients
In a separate bowl, whisk together the flour, salt, and baking powder. Gradually add this dry mixture to the wet ingredients, stirring until the dough starts to come together. You might need to use your hands to knead it just a little bit to get everything evenly mixed. - Divide the Dough
Once the dough is ready, divide it in half. Keep one half plain, and place the other half into a separate bowl. - Make the Chocolate Swirl
Add cocoa powder to the second half of the dough and mix until fully incorporated. This will create your beautiful swirl effect. Don’t worry if the dough looks a little crumbly at first—the cocoa powder can be a bit tricky, but just keep working it until it comes together. - Chill the Dough
Wrap both doughs in plastic wrap and chill in the refrigerator for 30 minutes. This step is crucial because it helps the dough firm up and makes it easier to roll out. - Roll the Dough
After the dough has chilled, remove it from the fridge. On a lightly floured surface, roll out the plain dough into a rectangle shape. Then do the same with the chocolate dough. You want them to be about the same size so they can fit together perfectly. - Create the Swirl
Lay the chocolate dough on top of the plain dough, then gently roll them together into a log shape. Make sure it’s tight but not too tight, as you don’t want to squish the dough out. - Slice and Bake
Slice the dough log into approximately ¼-inch thick rounds. Place the slices on the prepared baking sheets, leaving about an inch of space between each cookie.Bake the cookies for 10-12 minutes, or until the edges are golden. They will continue to cook slightly as they cool, so don’t worry if they seem a little soft at first.
- Cool and Enjoy!
Let the cookies cool on the baking sheet for about 5 minutes before transferring them to a wire rack to cool completely. This gives them time to firm up and get that perfect texture.
Nutrition
- Serving Size: 24
- Calories: 150
- Sugar: 8g
- Fat: 7g
- Carbohydrates: 20g
- Protein: 2g
Conclusion: Ready, Set, Bake!
And there you have it—perfectly buttery, beautifully swirled cookies that are sure to impress. I can’t wait for you to try these and experience that melt-in-your-mouth goodness for yourself. Trust me, once you bake these, they’ll become a favorite in your household too.
Don’t forget to share your creations with me on Instagram or leave a comment below. I’d love to hear how they turn out! Happy baking!